Last month I spent the week talking about color and the color wheel. I made a monochromatic pillow using different elements of design. This week I’m going to continue on with the color series as we only touched on a couple of different color schemes that the color wheel has to offer. I have some more projects to make to tie in a few more color schemes and elements of contrast. More great techniques and tools to use as well. Today I’m going to introduce you all to 3 easy steps to perfect couching using the complementary color scheme I left off with last month.
Did you pick which was your favorite combo? I’m still sticking with the blue/orange combo and adding white to help the complementary color scheme to add pop to the pillow.
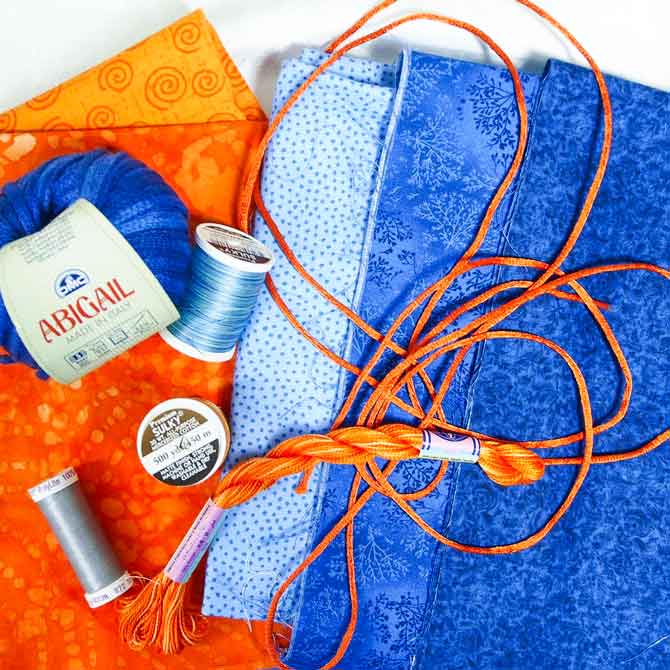
I gathered up a few supplies that I’m going to need over the next couple of days to create my project. Some fabrics to create the pillow cover – white, blue and orange. A ball of yarn and some cording in orange and blue to go with the fabrics. Quilting thread, a pillow form and of course the other usual quilting tools – a rotary cutter, ruler and mat.
What is Couching?
Couching is a form of embellishment done on the top of a fabric with yarn, cording or ribbon. This material is laid out on top of the fabric it needs to be attached to and then sewn down with either a straight stitch or a zigzag stitch. It’s most often used in art quilts. It’s also very common in embroidery. The couching adds texture and dimension to the fabric as well as the quilt.
Let’s get started and learn how to create some perfect couching in three easy steps.
What Yarn to Use
Just about any yarn can be used for couching.
Chunky yarn will give a bit of height and lots of dimension.
Flat yarn will sit right against the fabric. This type of yarn is great for covering raw edges of applique.
Knobby yarn makes for a very interesting texture especially the more knobby it is. This yarn is a bit harder to work with due to the knobs and inconsistent size of the yarn.
Cording can also be used which is more rigid than yarn. Cording gives a very definitive line look.
Heavy weight embroidery floss can also be used such as pearl cotton. This is not as heavy as yarn and gives a more delicate and fine line of couching.
As you see the possibilities are endless since the number of yarns out there are pretty much endless. DMC has a huge variety of yarns appropriate for couching, as you can see in photo below.
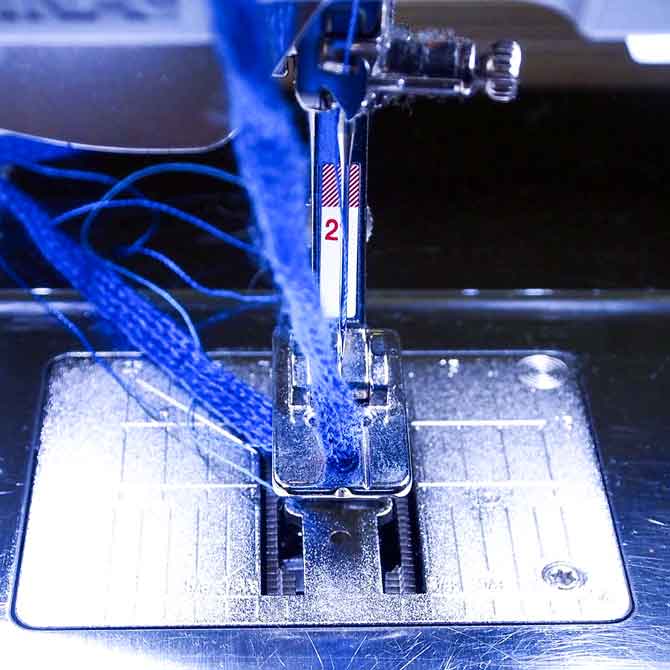
Step 1: using an appropriate foot for the job
A couching foot, also known as a braiding foot, can usually be purchased as an extra foot for your machine.
The couching foot has a hole for threading the yarn through and allows for even feed of the yarn under the foot of the machine when stitching in place.
The yarn comes from the back of the machine over the top and through the foot when using a couching foot. There’s a bit more control of the yarn when using a couching foot.
But…..
an open toed embroidery foot can also be used in place of a couching foot.
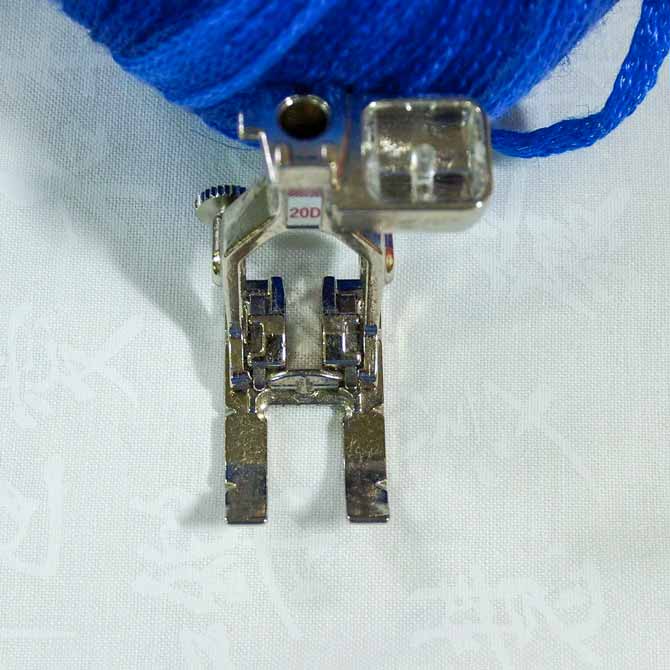
When using this foot the yarn sits in your lap and is thread from the front and under the foot to be stitched in place. Using this type of foot means that you have to guide and control the yarn as it’s being stitched to ensure proper placement of the stitching and yarn.
A couching foot is the best option but if not available then the open toed foot will do the job.
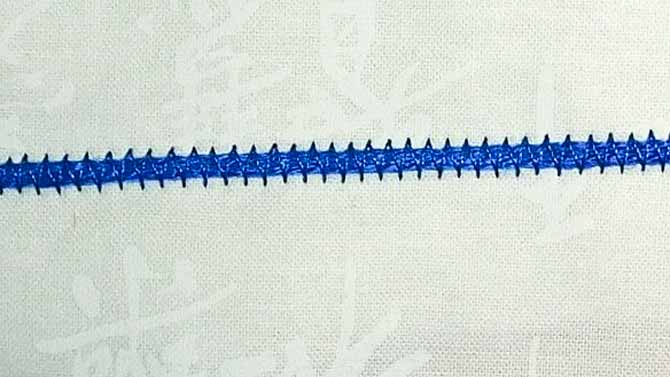
Step 2: using the appropriate sized zigzag stitch
The zigzag stitch is used to attach the yarn to the quilt. A straight stitch can also be used but I prefer the look of the zigzag stitch as it has a nice clean and smooth finish to it.
If the width of the stitch is too narrow then the yarn will have rolled up edges.
If the width of the stitch is too wide then the stitching will be seen beyond the edges of the yarn.
The key is to have the width of the stitch just at the outside of the edge of the yarn to secure it in place.
Step 3: using the appropriate thread
I just mentioned that it’s the yarn we want to see not the thread so how does one accomplish this. Well, there are a couple of ways.
Use a color of thread that blends in perfectly with the yarn as it’s being stitched in place. Gütermann thread comes in a huge variety of colors which makes it easy to find one that will blend in with the yarn being used. Either cotton or polyester will work for stitching the yarn in place.
Use a 60 weight polyester thread such as Sulky PolyLite. The finer weight thread will blend in very well with the yarn and hardly be seen since it’s so fine.
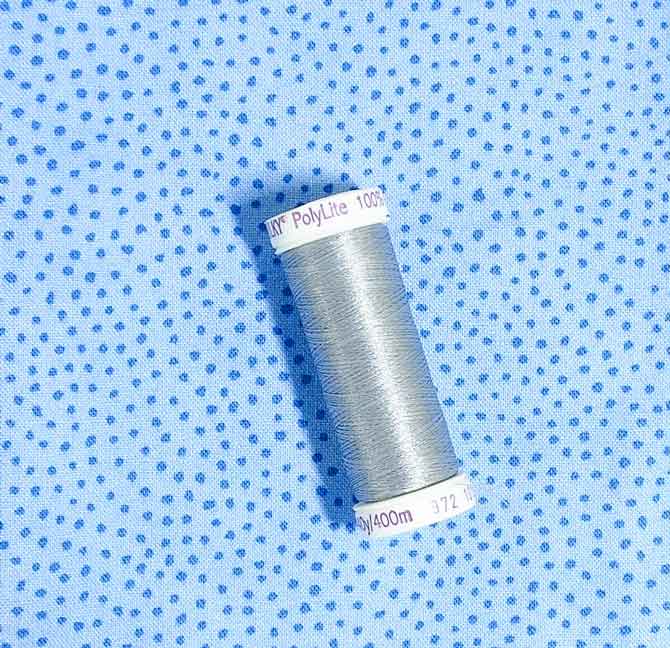
But conversely a rayon or metallic thread can be used to give a bit of shine to the yarn and allow the stitching to stand out slightly. I’m going to use a Sulky rayon thread for my couching which will add just a touch of shine. These threads are a 30 weight which means they are heavier but because they blend in well with the color of the yarn they won’t stand out too much.
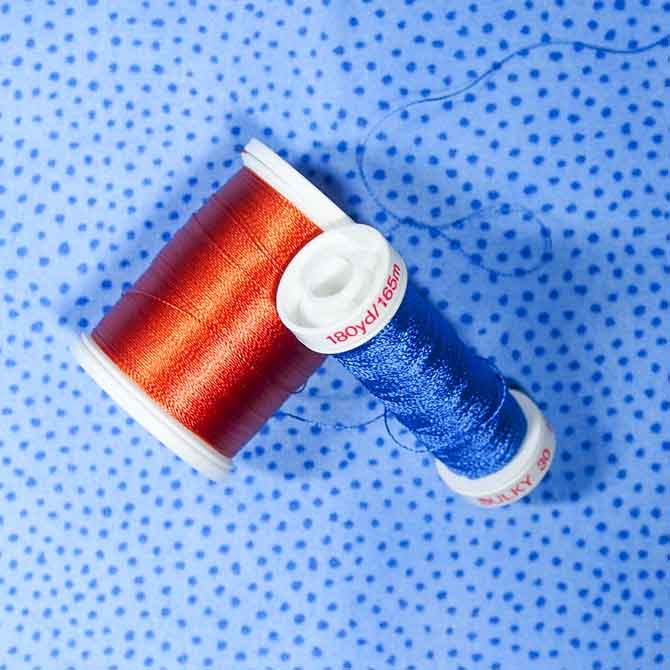
I started the couching on my pillow top and am very pleased with how it’s turning out. I love the shine from the rayon thread I used for the zigzag stitch.
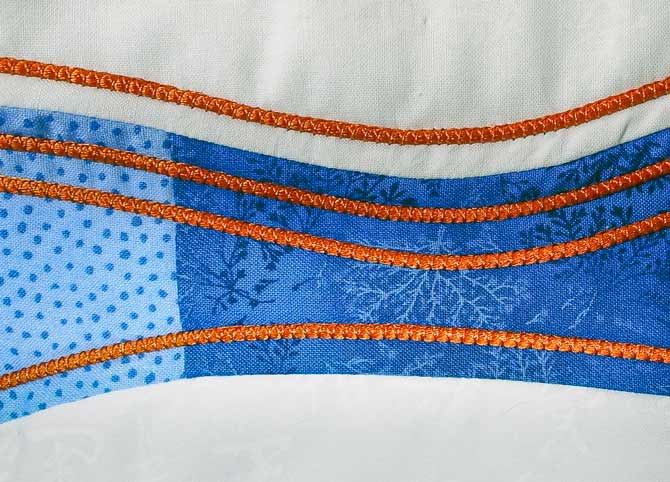
Who knew it only took 3 easy steps to perfect couching to embellish a cushion! Join me tomorrow, the fun is going to continue as the pillow top is completed. Happy Quilting!
15 comments