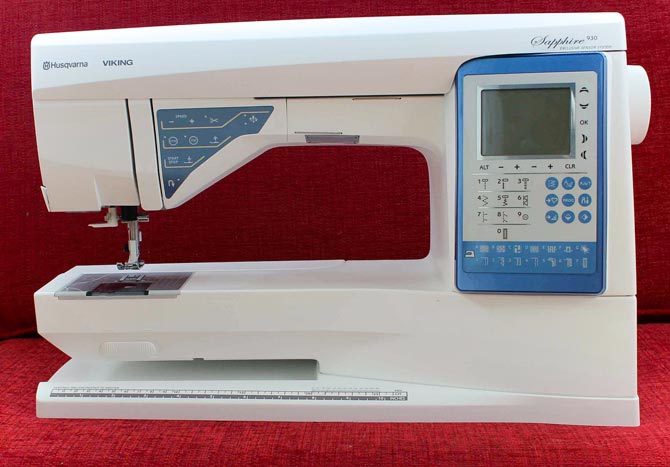
Welcome to the third day of our exploration of machine applique. I love machine applique. And when you have a wonderful sewing machine like the Husqvarna Viking Sapphire 930 to work with – well that makes the applique process that much more exciting. I’m so excited about sharing 11 tips for blanket stitch applique with you today.
Personally I like to call it buttonhole applique, but I tend to confuse people when I say that. Essentially they’re the same stitch – however the buttonhole stitch is much denser (stitches much closer together like when you’re making a buttonhole) than the blanket stitch. For today’s purposes, we’re calling it the blanket stitch.
Number 1 – set up the sewing machine
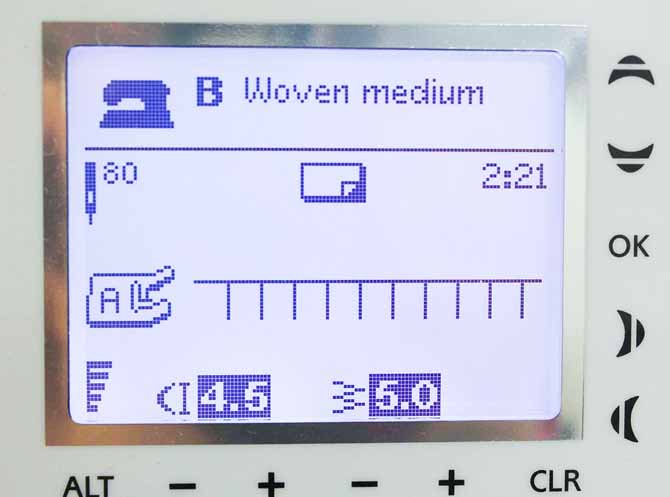
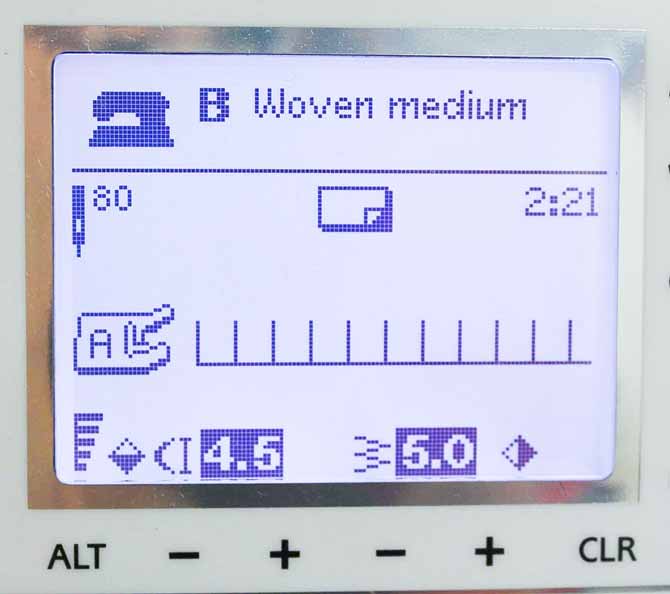
If you’ve been following QUILTsocial this week, you know the routine for setting up the sewing machine. Get that extension table on, use the general purpose needle plate, attach the open toe applique foot and we’re ready to start stitching.
Number 2 – choose a style of blanket stitch
The Sapphire 930 has three different styles of blanket stitch. This is so exciting. When I teach classes on machine applique, this is the one area where I find many other sewing machines fall short. Many do not even have one blanket stitch.
The flexibility of three different styles means that I’m certain to find something that’s going to serve my purpose. And let’s not forget that I can change the width and the length of all the stitches to further expand the possibilities.
One thing that’s very important when you’re stitching the blanket stitch is to appreciate the stitch sequence. In order to go around corners and points, you must know what the stitch sequence is or you’re going to have funny looking stitches. I’ve made a video clip of each of the three stitch sequences on the Sapphire 930 so you can better appreciate the difference between them.
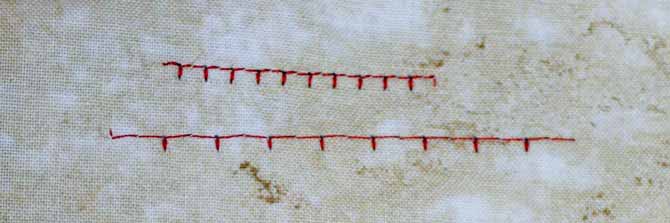
In this first sample, there are two stitches between each jog. So when I increase the stitch length, I’m increasing the length of those two stitches.
In the photo below, the top line of stitching is the default setting and the stitch length has been increased in the bottom one. Notice the two stitches between the jogs.
Blanket stitch with two stitches between each jog
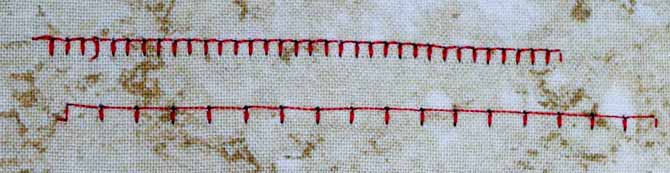
In this next sample, you can see the blanket stitch is quite heavy. That’s because everything is double stitched. This works if you want that blanket stitch to be very pronounced. This stitch takes more thread and longer to stitch and because of the double stitching, you absolutely must monitor the stitch sequence when turning corners.
The top line of stitching is the default setting and in the bottom sample, the stitch length has been lengthened.
Note there is only one stitch between the jogs.
Double Stitch Blanket Stitch
This last sample is a very basic, but probably the most used sequence for blanket stitch. There’s one stitch between the jogs and no double stitching. It’s easy to turn corners and go around points with this sequence.
In the photo below, the top line of stitching is at the default settings and in the bottom row, the stitch length was lengthened.
One stitch between jogs, blanket stitch
Although I love the double stitched blanket stitch, my preference is the basic stitch. It’s easy to work around corners and points, easy to remember the stitch sequence and I can always use a thicker thread if I want a more pronounced look.
But try them all – it’s good to actually see the stitch-outs of each so you can appreciate the difference.
Number 3 – that slant stitch is NOT an applique stitch
I have a confession to make. For many years, I wondered why sewing machine companies put a slant blanket stitch on the sewing machine. I mean really – how are you going to turn the corners and make nice stitching when it’s on a slant?
AHA – I’ve since learned that this is not an applique stitch. Nope – it’s an overcast stitch. On the Sapphire 930, stitch number 7 is the Overcast Stitch and stitch number 8 is the Stretch Seam Overcast Stitch.
See – there’s always something new to learn! I must have missed that in Home Ec!
Number 4 – choose a thread color
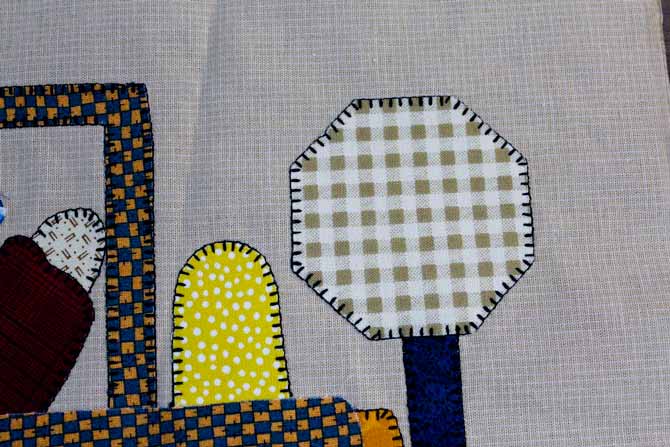
Choosing a thread color is a very personal decision. The look is totally different as you can see from the two samples below. The first one has matching thread for a bright cheery look and the second sample uses the sample color for all the applique pieces. That provides a more primitive, country look.
This is where a bit of investigation pays off. Take pictures at quilt shows, surf the internet. What do you like and what do you dislike? What’s the overall look and feel that you want to achieve with this quilt? What style is the quilt?
The more exploring you do, the easier it’ll become for you to figure out what you want. Sometimes it’s easier to start with just one color of thread. That choice certainly helps with the pocket book as you only have to purchase one spool of thread. If you decide to go with a dark color for all the stitching, I wouldn’t choose black. Black is very stark – try a deep brown instead. The look will be much warmer. Again – guidelines are just that – guidelines.
The other thing to keep in mind when you’re taking pictures and checking out what you like and dislike – write down why you like something and why you don’t like something. It’s not enough to say “I don’t like that”. Figure out why – that is very useful information.
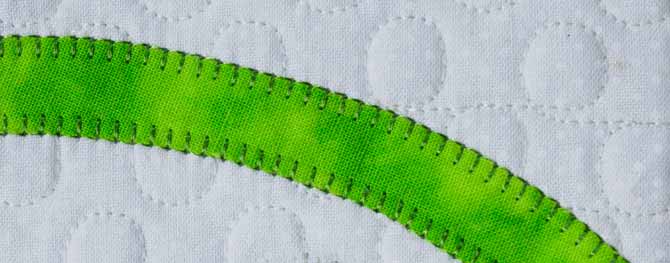
Notice how the blanket stitch, like the zig zag and the satin stitch, lies mostly on the applique shape. Only the right most part lies completely on the background. This ensures that the edge is secure and prevents a ridge from forming along the edge.
Another thing to consider when choosing your thread color is your thread stash. If you have loads of different colors, then use them. But if you have to start buying, then try to get one of each color in your project and use the same green for all your leaves/stems. One red for all the reds and so on. With each subsequent project, add another shade or two of those colors until you get the variety that you want. Sometime buying thread in a prepackaged bundle is more economical than buying individual spools.
Number 5 – choose your needle and thread
The options for thread are varied with the blanket stitch. If you’re looking for a primitive look, then go for a thicker non-shiny thread. If you want a bit of shine, use the 40 weight embroidery thread and if you just want ordinary stitching, then go for a 50 weight thread that you would piece with. Don’t want the stitches to show at all? Try invisible thread.
I can’t say it enough – try the various thread weights and types and see what look you want for your piece. What inventory do you have of the thread you want to use? Do several stitch-outs with the three different blanket stitch options – which one do you prefer for this project?
Once you have your thread picked out, then choose an appropriate needle. Again, I always reach for a Microtex as my first option. If I’m using thicker threads, I’ll use a Topstitch needle. And don’t forget to choose the needle size that’s appropriate for your thread. In most cases unless you’re using a very heavy thread, you should be fine with an 80/12 needle. If you end up using invisible thread, go for the smallest needle you can thread – I like the 60/8 size.
What thread to use in the bobbin? Regular piecing thread should be just fine. If you’re using invisible thread, you might want to put a bobbin weight thread in the bobbin.
Number 6 – turning corners and points
Turning corners can be a bit tricky with the blanket stitch. Knowing the stitch sequence is critical to the success of the corner or point. You never want to pivot around a corner when the stitch sequence is not complete. This will result in a lop sided stitch.
As you approach the corner and you see that your stitch length is going to take you past the corner or not quite reach the corner, simply raise the presser foot and shift your work forward or backward so the needle will come down right at the corner. Then you decide whether you’re going to pivot 45 degrees or a full 90 degrees into that corner.
In the sample below, the corner on the left was done with two 45 degree pivots and the corner on the right was done with one 90 degree pivot.
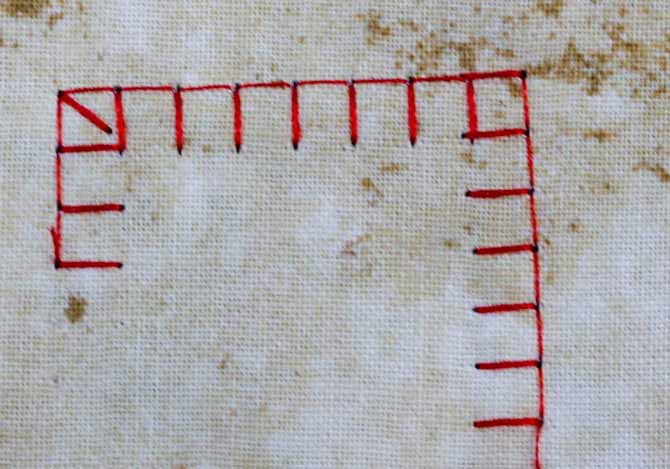
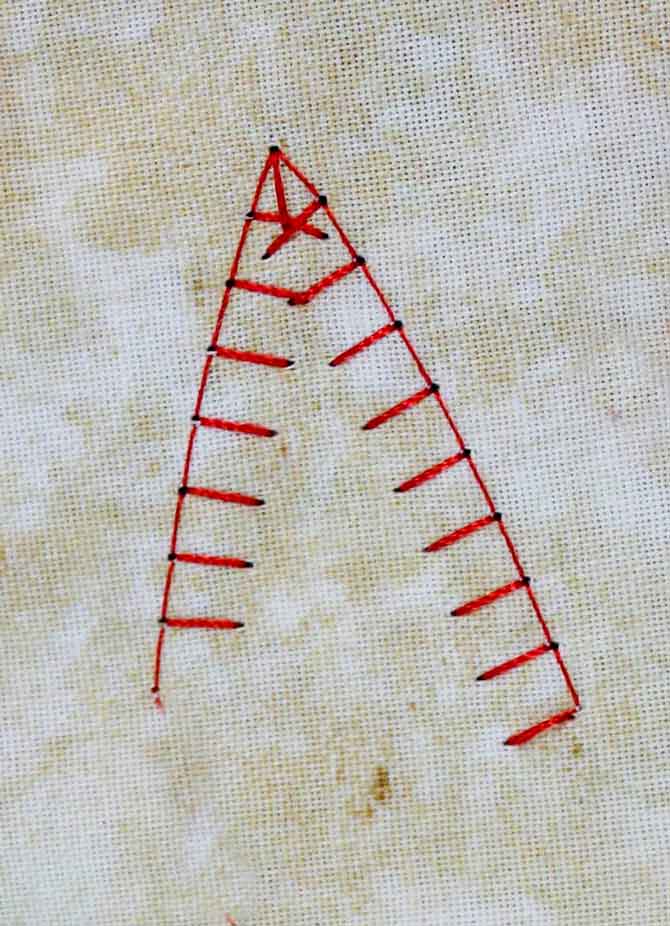
Turning the corner at a point, requires two pivots of whatever angle is appropriate for the sharpness of the point.
This does take a bit of practice, but do one or two and you’ll get the hang of it. Notice I didn’t even use any applique shape for my stitch outs. Just practice turning the corners and the points on a piece of fabric. When you understand the stitch sequence, then try it on a practice applique shape. When you’ve mastered that, you’re ready to try the stitch on your project.
Number 7 – width of stitches
I haven’t really touched on how wide of a stitch to choose for any of the applique methods. The guideline is to keep the stitch width somewhat in perspective to the size of the applique piece. So if you have a large shape, you can use a wider stitch. If the shape is fairly small, use a narrower stitch. That applies to ANY of the applique stitches.
The wider the stitch, the harder it is to manoeuvre around corners and points. Don’t be afraid to vary the width of the stitch on the same project. If the leaves are big and the flower petals are smaller in scale, then use a wider stitch on the leaves and a narrower width on the petals.
And don’t be afraid to mix the type of applique stitches on the same piece. You want to use blanket stitch on one section and satin stitch on another? Go ahead.
Thankfully, there are no rules and no quilt police.
Number 8 – type of applique
So where would I use the blanket stitch versus the satin stitch or the zig zag stitch? Well that’s the beauty of the blanket stitch – it can be used in many situations. If you want to finish off the edges of your fusible applique – blanket stitch works like a charm and provides a very nice sturdy edge. If you want to do invisible applique with it – that works also.
Number 9 – use blanket stitch for invisible applique
Here’s a sample of the blanket stitch used for invisible applique. I find using the blanket stitch is a bit trickier than the zig zag for invisible applique. You need to be conscious of the stitch sequence when using the blanket stitch, while the sequence of the zig zag is pretty simple. So if my applique pieces were pretty basic, then I could easily go with the blanket stitch. If there are a lot of points and curves, then I might consider the zig zag as it is more forgiving.
Number 10 – mirror, mirror
The zig zag stitch and the satin stitch are symmetrical. Both sides of the stitches are the same. However the blanket stitch is an asymmetrical stitch. The most common way the stitch is used is for the long part to run parallel to the edge of the applique with the jogs sitting on the applique shape. In some instances, it’s necessary to have that line go in the opposite direction.
No problem with the Sapphire 930. Choose the stitch and the other appropriate settings. Then hit the Mirror function on the Touch-panel and the stitch is now mirrored. You can mirror end to end or side to side.
Number 11 – use blanket stitch to machine stitch a binding on a quilt
As much as I dislike bindings sewn on by sewing machine, (yes – I’m a traditionalist at heart) machine sewing bindings is becoming the norm as we attempt to get things done quickly.
I’ve been learning the grand art of sewing bindings down by machine. The first ones were hideous. But I have to say that I’m becoming proficient at it. The trick I learned is thread color! I’ll be putting together a tutorial for you to share my findings.
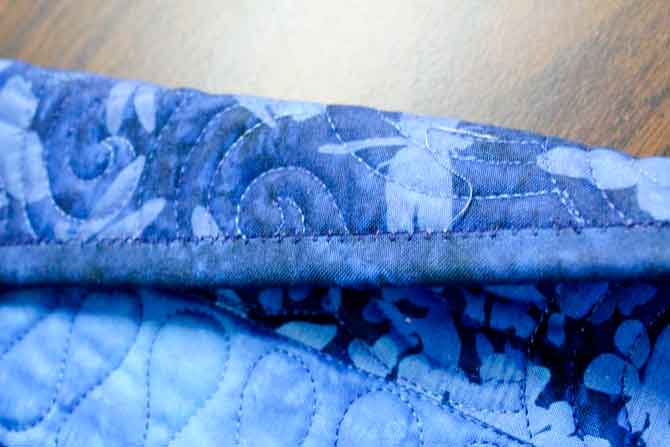
Essentially, you sew the binding to the back of the quilt and then fold it over to the front. Then using a blanket stitch – you applique that binding in place. This is one instance where I needed to use the mirror function in order for the blanket stitch to fall in the right place along the edge of the binding.
Check out the quilt below – the biggest issue is getting the stitches even on the back all the way around. I’m working on that skill.
Wow – wasn’t that exciting! There are so many options for applique on the Husqvarna Viking Sapphire 930 that – well what am I still doing sitting at the computer? I need to be stitching!
Tomorrow, I’ll provide some general tips for all types of machine applique and we’ll look at some wild card stitches. In the meantime, try these 11 tips for blanket stitch applique, and let me know how you did. Ciao!
6 comments