Yesterday I looked at 3 east steps to perfect couching and today I’m going to add onto those with 2 more tips you should know for perfect couching.
Bonus Tip #1
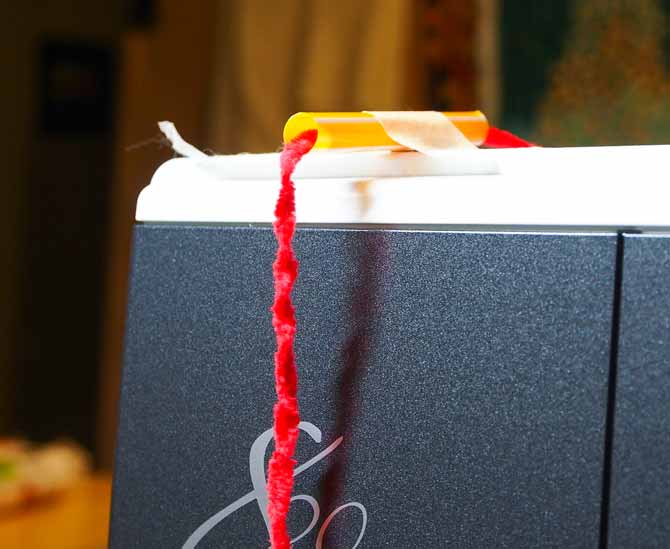
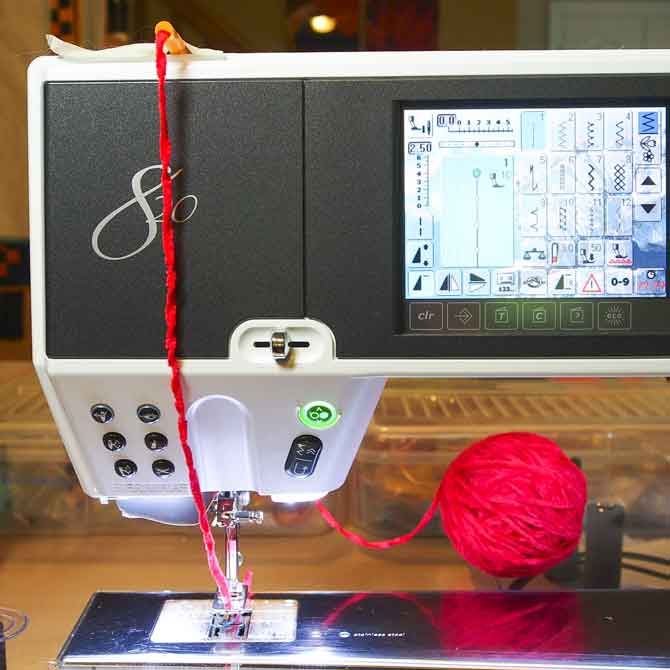
Sewing machines have become very streamlined and sleek in their looks with no extra pieces sticking up on top which makes it hard to guide the wool or yarn over the top of the machine into the couching foot.
A piece of a wide diameter straw such as a milkshake straw works wonders as the yarn guide.
Placing the straw on the top of the machine with a piece of tape allows for the yarn to be guided through the straw and down the front of the machine into the couching foot.
The straw as a yarn’s guide only works with the couching foot as the yarn is fed from the back of the machine.
Bonus Tip #2
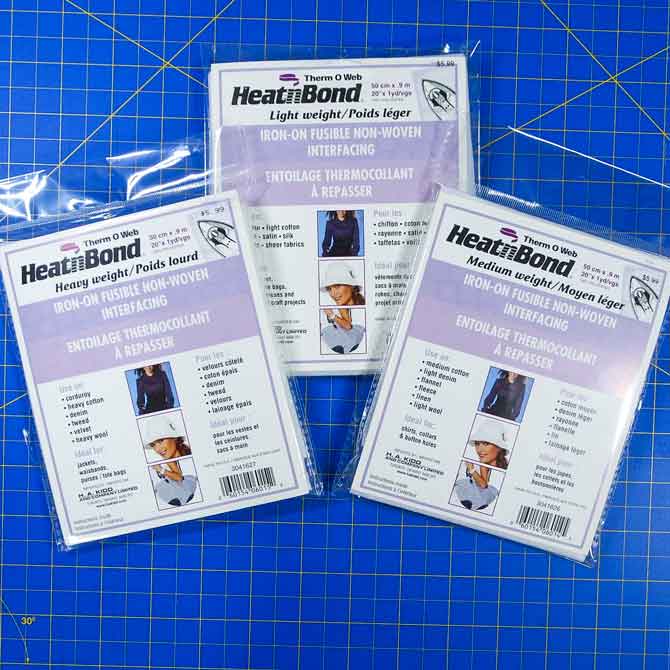
Couching results will be much improved if the couching is done on a stabilized piece of fabric. The stabilizer can be one that stays in the quilt or is removed after the couching is completed. By using a stabilizer the zig zag stitches have more layers to attach themselves to resulting in a nice even and smooth stitch which means the yarn will lie evenly along the fabric.
I personally prefer to use a leave-in fusible non-woven stabilizer when a stabilizer is used. No extra work of tearing off the stabilizer after the stitching is done. Heat N Bond has a great product that comes in three different weights – light, medium and heavy depending on the project and type of fabrics being used.
It can be purchased by the yard or in a package.
But for this project I chose to use the three layers of the quilt sandwich as the stabilizer because I decided that the couching would also act as the quilting. When a piece is this small and if enough couching is done then no further quilting will be needed.
Note that the batting is white. I normally use a natural colored batting except when working with white fabrics. I don’t want to take the chance of the cream or natural color showing through the white fabric as it will alter the white color.
Stopping the Frays
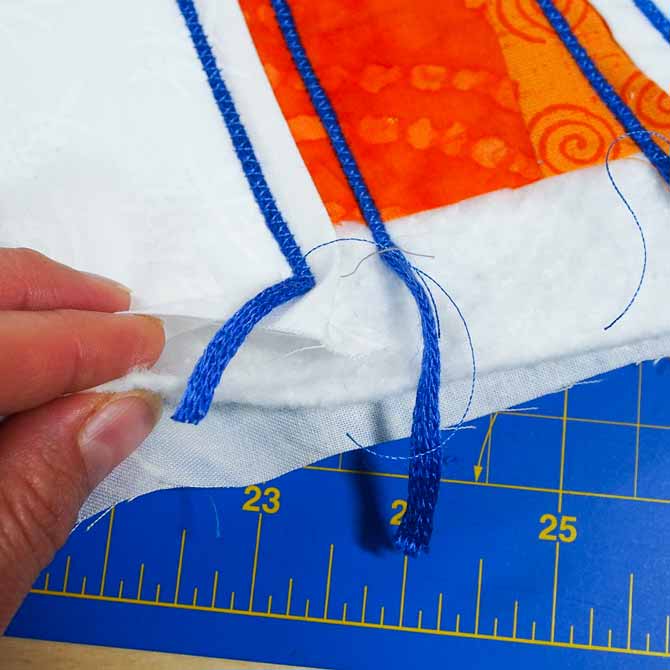
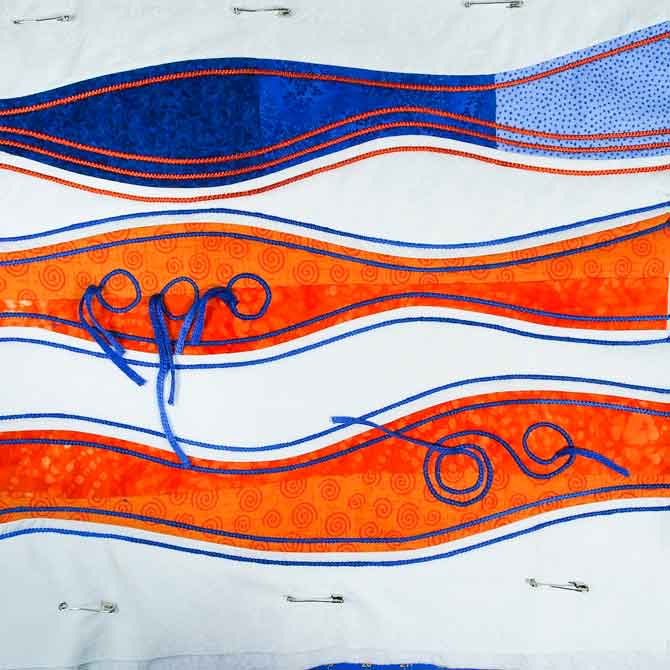
Along with the curved lines of couching I did a few circles to fill in some of the negative space and give a bit more contrast to the piece. Even tried my hand at a spiral. When circles are made with couching it means that there are two ends to the circle – one at the beginning and one at the end that need to be secured in some manner so that the yarn does not fray.
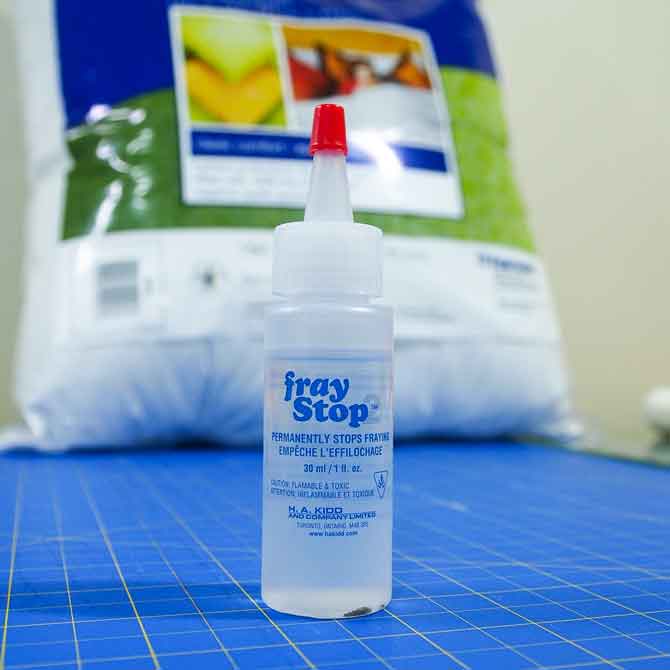
Fray Stop 2 from Unique is the perfect tool for the job. It’s easy to apply with a built in applicator, dries clear and any residue will wash away in the wash.
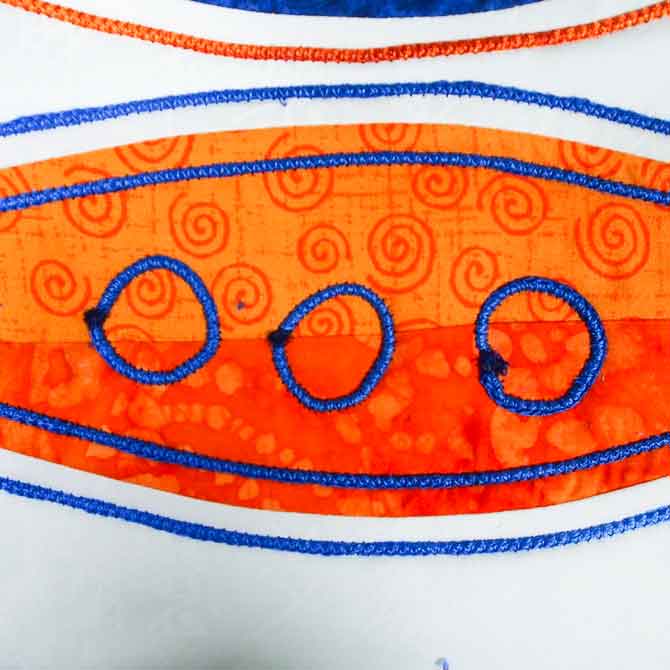
After cutting off all the ends of yarn I applied the Fray Stop – one drop per area. You can see it as a dark spot on the blue circles in the photo below.
No More Color Running
Speaking of washing I would probably add a Dylon Dye Capture sheet to the wash when I wash this piece seeing how I didn’t pre-wash any of my fabrics and I wouldn’t want any of the orange or blue colors running into the white background fabric. The sheets capture any loose dye in the wash preventing color runs. A simple and easy way to ensure the piece comes out as it went in.
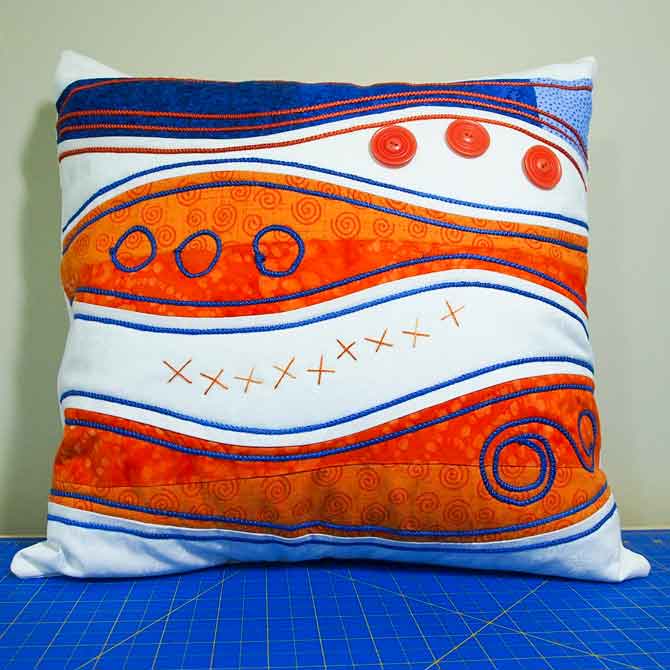
I figured I would add a few buttons to the piece with some DMC floss seeing how I have them and I love buttons. Not to mention these Elan buttons look great.
Perfect Corners
Now that the pillow top is all done it’s time to turn it right side out and put the pillow form in. I’ve got a great little tool here to make sure all the corners are pushed out and looking perfect. It’s called the Point Turner from Unique. Use the pointed end to pop out those corners – better than your fingers as it gets right in there and does the job perfectly.
Now I have another over stuffed colorful pillow to go along with my monochromatic one and I used several of the contrast elements I talked about last month in this one too. I ended up sewing the buttons on with regular thread as the needle I was using with the embroidery floss didn’t go through the holes in the button.
The floss I made stitched X shapes in another section of the pillow. I wasn’t going to waste the floss since I already had the needle threaded. And that is my attempt at embroidery – pretty basic but it works.
Check out my website, Quilts by Jen, for a tutorial on curved piecing.
It’s been a great two days talking about couching and creating a complementary color schemed pillow cover in blue and orange. What color did you make yours?
Which color scheme is next? How about one that creates a triangular shape on the wheel and uses three colors but it has been a busy day so triangles can wait until tomorrow.
Hopefully these 2 more tips you should know for perfect couching will make your couching experience a breeze and it will be a technique you use over and over again. Happy Quilting!
3 comments