In yesterday’s post, we created strip units with our white and light blue fabrics to create the base of our Winter Sunshine quilt. That was the main idea when I was creating my quilt, to play with monochromatic and texture to depict winter scenery. But I didn’t want my quilt to be too linear. I felt I needed to break the flow, so I came up with a quick way to create movement in my piece.
I thought creating 6 units where the seams align horizontally would definitely create movement where all the other seams are vertical. Here’s how I quickly created those units while adding bolder colors.
cutting instructions
In your B fabric, cut:
- 1 – 2¼” strip (set aside for Friday)
- 2 – 1½” x 22” strips
- 2 – 2” x 22” strips
Then, cut each strip in half so you have:
- 4 – 1½” x 11” strips (B1)
- 4 – 2” x 11” strips and cut in half lengthwise (B2)
In your C fabrics, cut:
- 1 – 2¼” strip (set aside for Friday)
- 2 – 1½” x 22” strips
- 2 – 2” x 22” strips
Then, cut each strip in half so you have:
- 4 – 1½” x 11” strips (C1)
- 4 – 2” x 11” strips and cut in half lengthwise (C2)
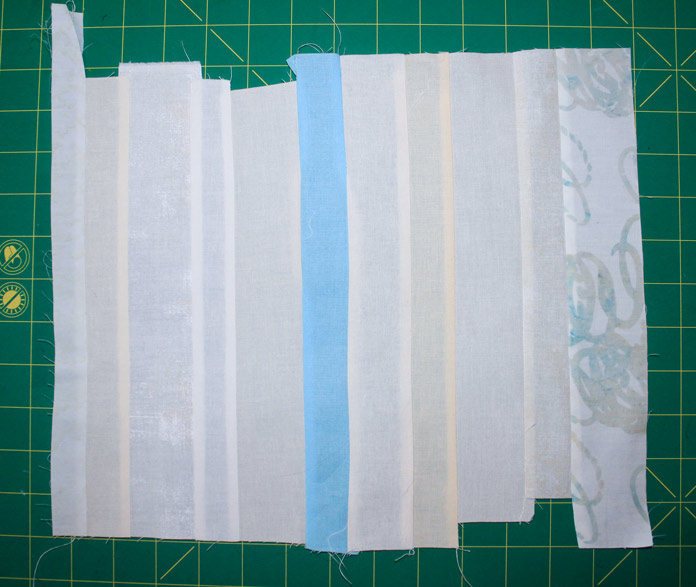
Take 2 A units from the pieces you made following yesterday’s post, and sew them randomly together, adding a B1 strip in the middle.
Repeat to make 2 units.
Sew the 2 units together, adding a C2 strip in the middle. The unit should now measure approximately 10’’ x 16’’.
Note: As this is improv quilting, I played a little bit with my piece. Notice in the picture that I removed or reduced some of the Group I strips to get the look I was aiming for.
Align your ruler along the unit, ensuring your seams are following your lines on the ruler. Cut 6 strips with the width varying from ¾” to 2½”.
Fold the strips in half, right sides together, and sew the edges together to make a tube. Use your seam ripper to cut one seam from each tube randomly. Let’s call these the Group III units. Notice I’m still using my UNIQUE sewing seam-fix red seam ripper and thread remover! You can read all about my new favorite tool in one of my older posts.
Creating tubes and removing seams randomly allows you to have 6 strips that are not identical even though they came from the same original unit. It’s a technique also used to make a Bargello quilt. Tomorrow, I’ll show you how to insert these units into the Winter Sunshine quilt.