Finishing the Quilted Bucket Bag
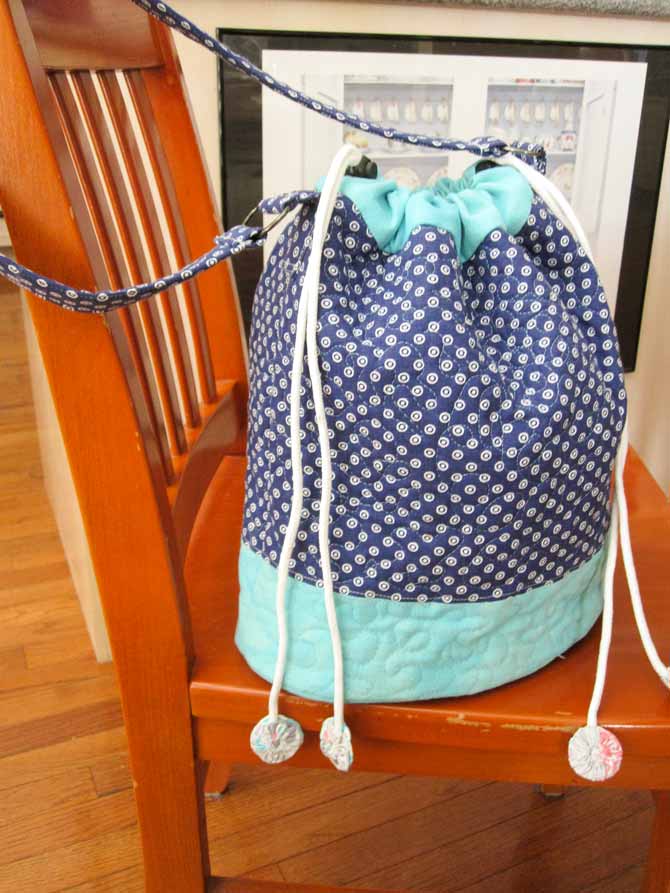
This week on QUILTsocial, we’ve been making an easy breezy bucket bag to tote around all the necessities for a fun summer road trip. You must agree, by now, it’s looking really road worthy, but it needs hanging tabs and a strap to make it truly portable. A few tips on finishing the quilted bucket bag.
- Cut a piece of fabric 4″ x 36″. This fabric can be contrast fabric or the same as the main body.
- Cut a piece of batting, 2″ x 36″.
- Spray baste the batting strip to the center of the strap strip.
- Fold the raw edges over the batting.
- Fold the strap strip in half. Pin and press. (see photo)
- Topstitch both sides of the strap.
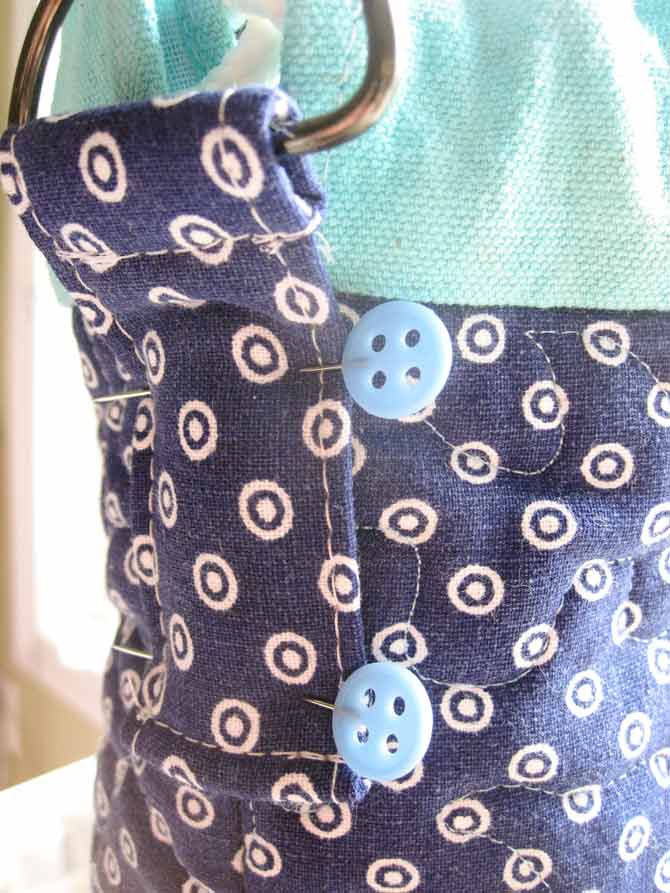
- Cut off 8″ of the strap to make the hanging tabs.
- Press a scant hem on one end. Thread the tab through the flat end of the D-ring. Use your machine’s zipper foot to sew close to the D-ring. Repeat for the second hanging tab.
- Use a chalk pencil to mark a line 2″ from the top of the bag.
- Repeat for the other side of the bag. Turn a scant hem on the raw edge of the hanging tab. Press.
- Pin the hanging table so that the end of the tab sits on the marked line.
- Repeat for the second hanging tab.
- On the strap, turn under a scant hem. Press.
- Thread strap through the curved edge of the D-ring. Use the zipper foot to sew the strap to the D-ring.
- Repeat for the other side.
Ta da! Your easy-breezy quilted bucket bag is ready for life on the road. Pack up your essentials and head for the car.
Okay, the price of gas means you’re going to go for a picnic in a nearby park. But, look how cute that bag is, it’ll take you virtually anywhere — near or far!
Now that we’re done with finishing the quilted bucket bag, my time on QUILTsocial is over for now. But, I hope you have great (and safe) summer adventures — filled with lots of fun. And, please remember to make a mess while you are creating some fun!
4 comments