Did you sit and doodle with pen and paper as a kid? In a way, free motion quilting is like doodling only with different tools – sewing machine, needle, thread and fabric. Today, I’m going to set up some free motion quilting for this What’s Good For the Gal is Good For the Guy quilt challenge.
Which foot to use
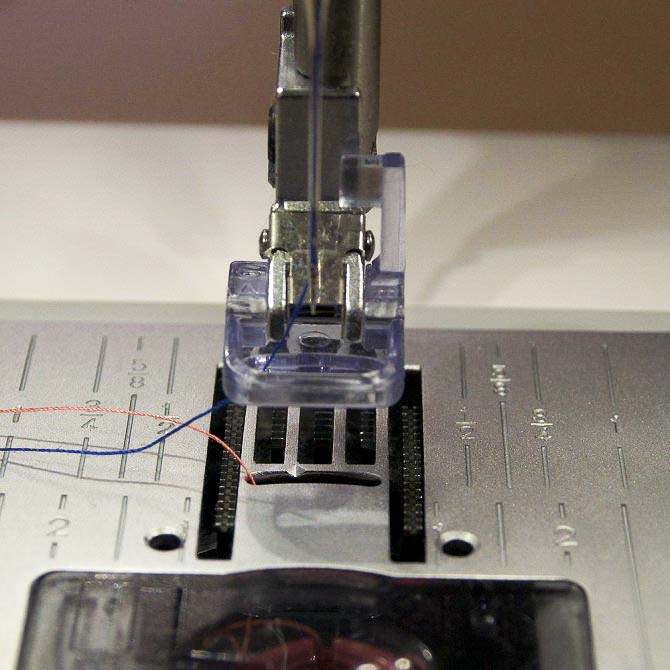
There are three different free motion feet you can use with the PFAFF Creative 4.5. They are the Dynamic spring free motion foot, the spring free motion foot and the sensormatic free motion foot. I have decided to use the sensormatic foot, which is the easiest to put on the machine and requires no extra tools because it goes on the same as all the other feet.
I used the spring free motion foot last October to quilt the Maple Leaf Mug Rug.
Just remember to disengage the IDT system before putting the foot on.
Dropping the feed dogs
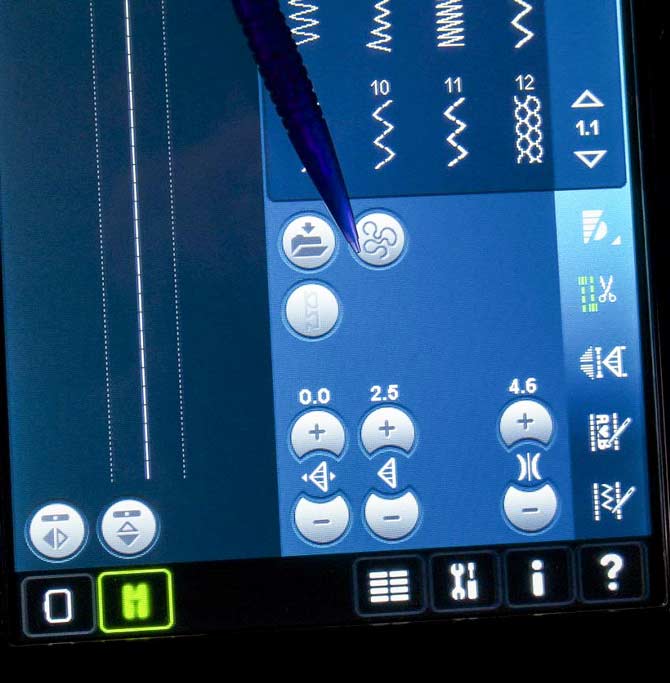
In order to drop the feed dogs, the free motion feature of the machine needs to be activated. With the stylet, click on the free motion icon.
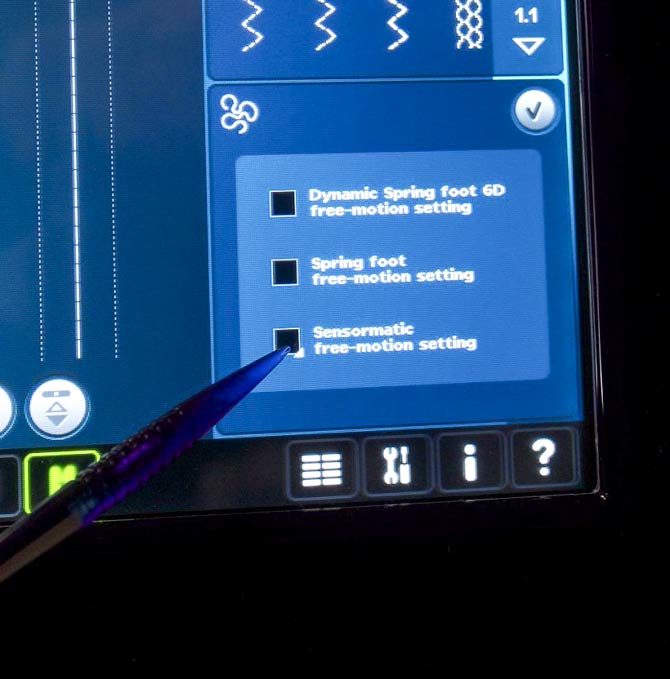
There will be another pop up menu that gives you a choice for which free motion foot is being used. Since I am using the sensormatic foot, I clicked on the box beside it. Once you have made your selection, click on the check mark in the upper right hand corner to activate the free motion and drop the feed dogs. You will hear the feed dogs drop.
Adjusting the tension
In order to have perfect looking stitches, you need the tension set appropriately on the machine. One of the nice things about these computerized machines is they have preset tensions which, for the most part, are bang on and with adjustment needed. But, it isn’t always right, especially if heavier weight threads are being used or thicker layers of fabric or two totally different threads are being used together.
Most quilters are very afraid to touch the tension knob or buttons – don’t be – they can always go back to where they were. To get the best stitches, the tension buttons sometimes need to be adjusted.
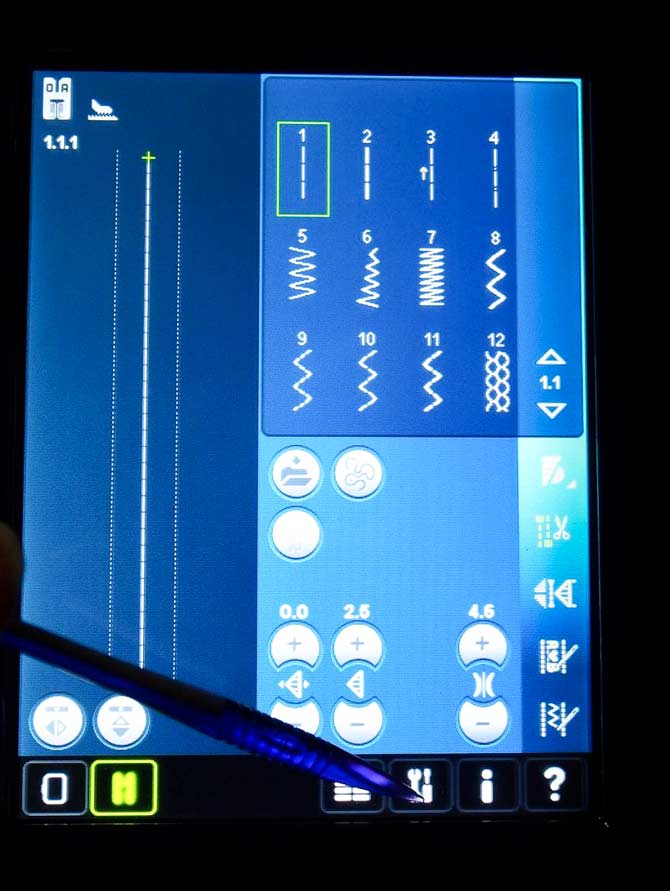
On the Creative 4.5 there is a default tension set for all stitches. It is found in the setting section of the machine. Click on the tools icon to access it.
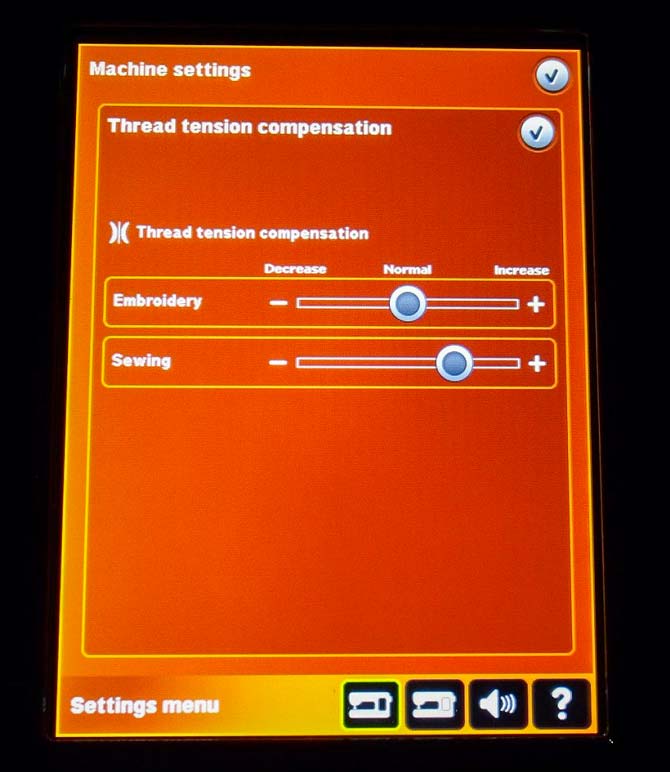
The default tension can be changed at any time, if need be. It’s called the thread tension compensation in the settings section.
The thread tension compensation can be adjusted and remains adjusted even when the machine has been turned off. There is the option to change the tension for either embroidery or sewing – just slide the button in the direction needed.
Temporary adjustment of the tension can be done from the home screen and the icon for this is found at the bottom right of the screen above the information icon. Use the + and – buttons to increase or decrease the tension respectively. When the tension has been changed, the number above the icon will be in green.
When the machine is shut off and turned back on, the tension will return to the default setting.
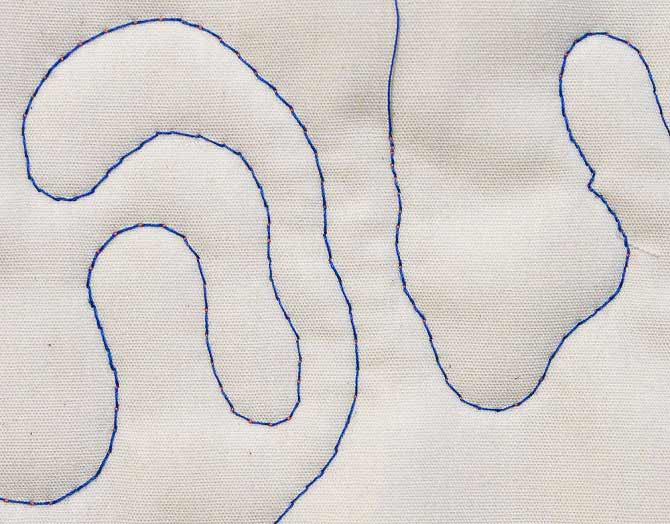
Correct tension
The top and bobbin thread meet between the two fabric layers with neither showing elsewhere. No adjustment is needed. The stitching in the photo below shows good tension.
Loose tension
If the top thread is visible on the underside of the work then the tension is too loose and needs to be increased. Increase the tension by using the + button. The stitching in the photo below shows the top thread being pulled to the back side – almost looks like eye lashes.
Tight tension
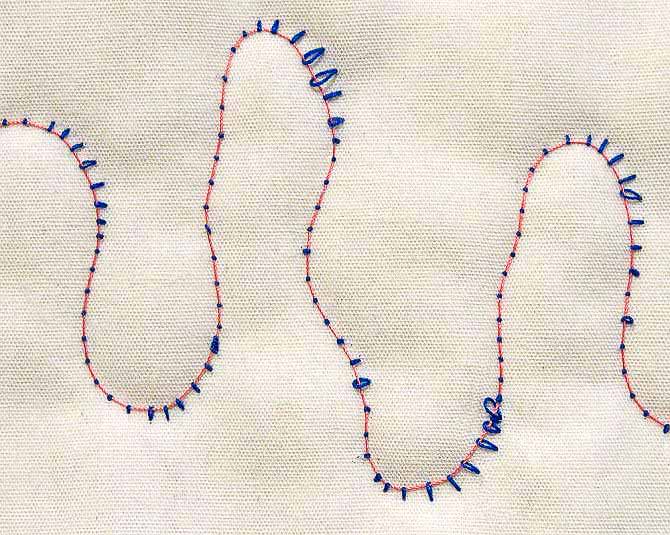
If the bobbin thread is visible on the top side of the work then the tension is too tight and needs to be decreased. Decrease the tension by using the – button. The bobbin thread is showing through on the top – you can see orange dots between the blue stitches.
Just a note, when doing decorative stitching the tension is slightly loose and the top thread will show on the back of the fabric.
Although I didn’t get that far with the free motion motifs today, I did do the valuable set up of the machine for the free motion quilting.
Moving one step further to the completion of the What’s Good For the Gal is Good For the Guy quilt challenge, I’ll be checking out some free motion quilting motifs tomorrow. Free motion quilting is like doodling just with fabric, thread and needle rather than pen and paper.
Happy Quilting
10 comments