Yesterday, you learned some general guidelines for modern quilt design. Let’s put that information to work in making your first modern quilt place mat.
I started with one of my favorite blocks (#60) from the 100 Modern Quilt Blocks book by Tula Pink. All the blocks in this book are 6″ square. I wanted a 12″ x 18″ place mat, so I drew the block using EQ7 (Electric Quilt) and then re-sized it to the correct size. This program also told me the size to cut each piece. If you don’t use EQ, you can draw the block on graph paper (all the measurements are given in the book) and then enlarge it to the right size by using a photocopier or scanner.
Here’s the original 6″ block.
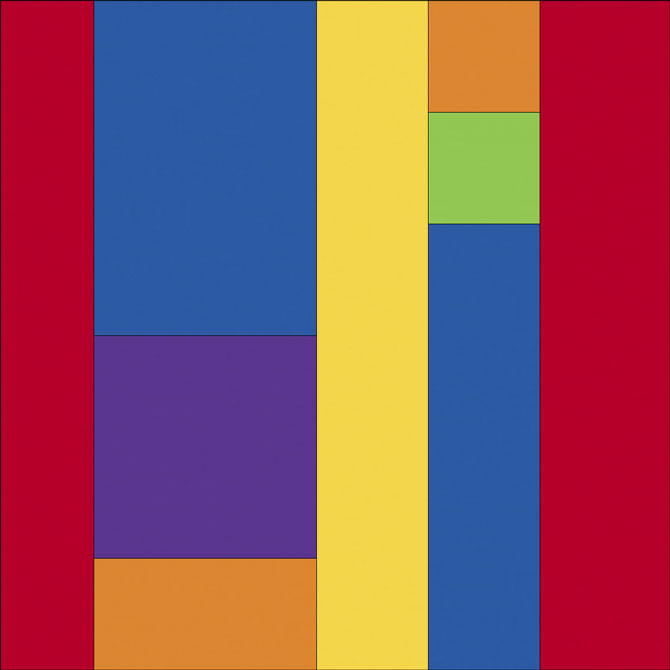
And here’s how the 12″ x 18″ place mat will look.
Cut these pieces for place mat #1 and you can get started right away! Of course, you can use different fabrics if you wish.
Red: 1 – 3″ x 12½”
1 – 4″ x 12½”
Blue: 1 – 6½” x 6½”
1 – 3½” x 8½”
Yellow: 1 – 3½” x 12½”
Orange: 1 – 2½” x 6½”
1 – 2½” x 3½”
Green: 1 – 2½” x 3½”
Purple: 1 – 4½” x 6½”
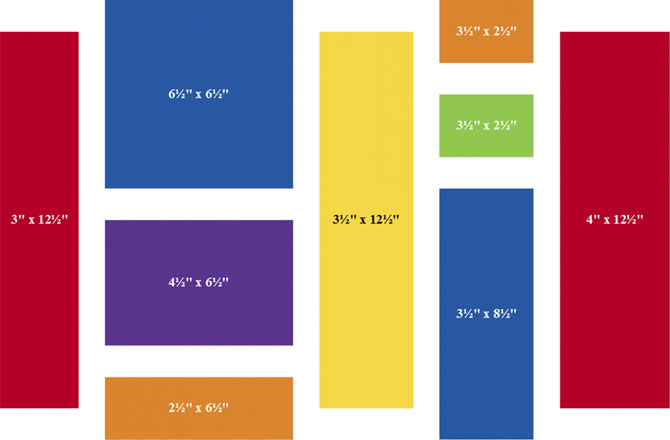
Sew the pieces together to make vertical rows. Press seams as desired.
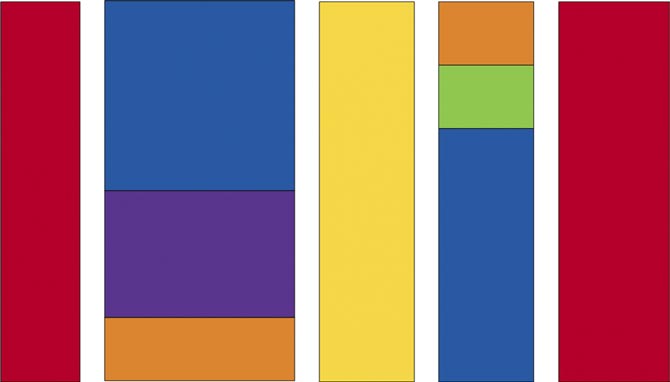
Sew the rows together to make the place mat. It should measure 12½” x 18½”. Press seams as desired. And there it is – your first modern design!
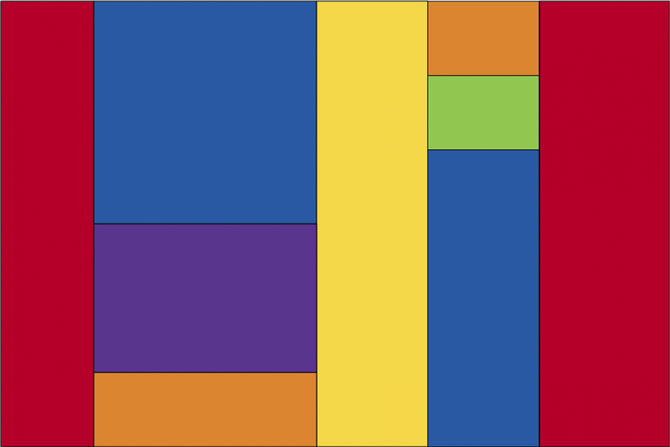
Making your first modern quilt place mat is really easy. Join me tomorrow to get the cutting and sewing instructions for 3 more modern quilt place mats.
4 comments