Last month I finished off my week on QUILTsocial by looking at some of the zigzag and satin stitches available on the PFAFF Creative 4.5 sewing machine. Since January, I’ve been working with this machine to create the What’s Good For the Gal is Good For the Guy challenge quilt. This week, I should come really close to finishing the quilt. But, before the last stitch is actually stitched, I still need to pick an applique stitch. Today, I’m going to check out more decorative stitches on the PFAFF Creative 4.5.
As you may also recall from last month, I have a huge library of stitches to choose from on the Creative 4.5 sewing machine. I’m not sure about you, but sometimes, having too many choices makes the deciding a whole lot harder! Today, I’m bound and determined to make a decision and get on with the stitching of the applique pieces.
Blanket stitch
One of the most common stitches used to stitch around applique motifs is the blanket stitch. It’s one that I use frequently in my work especially on children’s quilts.
Going into the stitch menu on the Creative 4.5, I found the blanket stitch in section 2 under “handlook” stitches. There were a few choices of different blanket stitches.
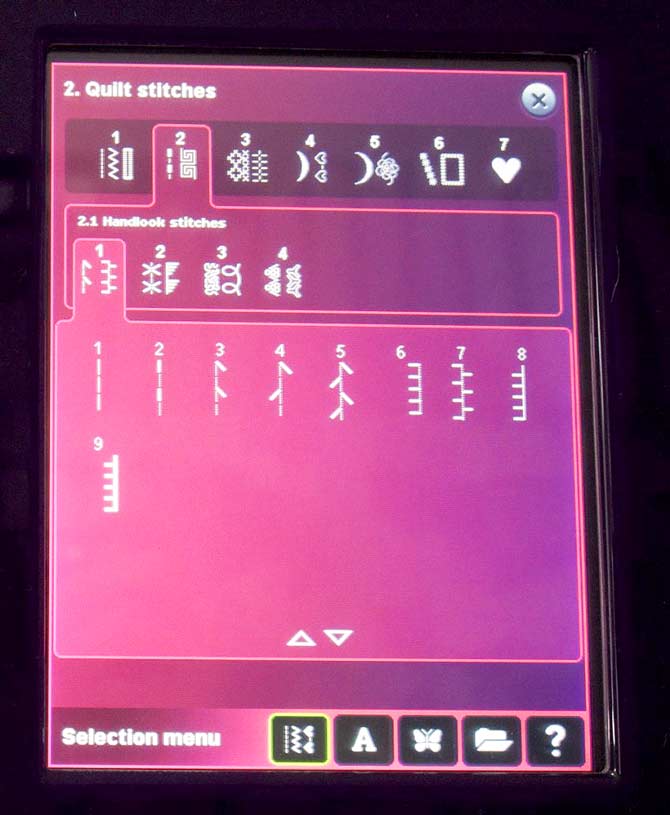
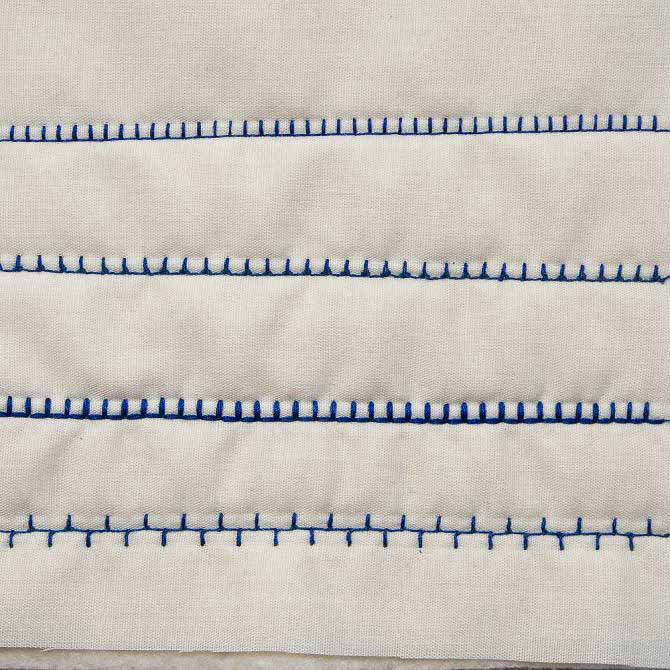
In the photo below the top line of stitching is a regular blanket stitch (#8 in the menu above) – a single stitch horizontally and vertically.
The next line of stitching is a variation with two short stitches between each bite (#6 in menu above) while the third line of stitching is a double stitch blanket stitch (#9 in menu above). This double stitch makes the blanket stitch stand out more especially if a heavier thread is used.
The last line of stitching is another version with the bite alternating sides from the horizontal stitch line (#7 in menu above).
Decorative stitches that look manly
Since this quilt is for a young man, I wouldn’t want to be adding decorative stitches that looked girlie such as hearts, flowers and leaves. I went searching for stitches that had a more manly look to them and came up with a few that I think are interesting.
The four pictured in the photo below I found under section 5.3 called “Art Stitches”. Although they are really interesting stitches they won’t work very well for securing the applique pieces because they are too difficult to place along the edge of the applique shape.
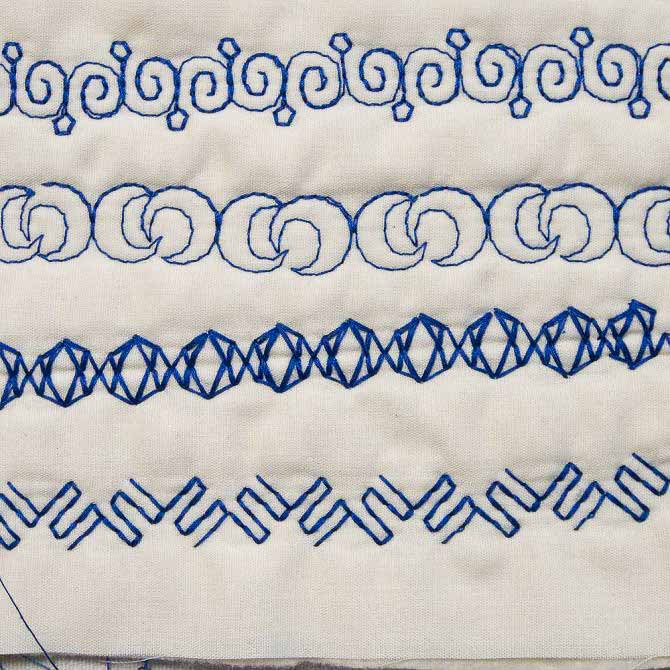
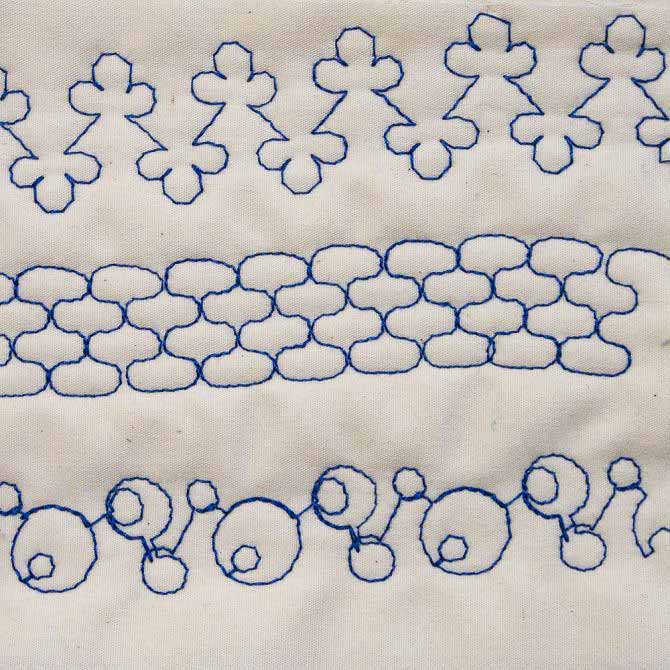
These next three I found under section 5.5 and they are categorized as “stippling stitches”, although I didn’t use a free motion foot to stitch them. But, when I was reading the manual about free motion, any of the decorative stitches apparently can be used with the free motion foot.
I love the circle in a circle motif.
Sewing in four directions
If you want to sew a square or rectangle design, then check out the four direction decorative stitches in section 6 of the stitch library. When I saw the square stitches, I thought: “how cool”.
I gave a couple a go and discovered that I don’t have very straight sides. Here’s the first try with just a zigzag stitch.
To change the direction of sewing,use the arrow icons in the lower middle section of the screen. Each arrow points in a different direction. The button will light up green when in use. Don’t forget to use the stylet when touching the screen.
In future, I think I will mark the lines out on the fabric of where I want the stitch to be so that I end up with a straight square or rectangle rather than a lopsided one. Also, I wouldn’t have to count the stitches for each side because, unfortunately, the machine didn’t do this for me.
Anyway, it’s a fun little stitch. Here’s another one where the stitching looks like a honeycomb.
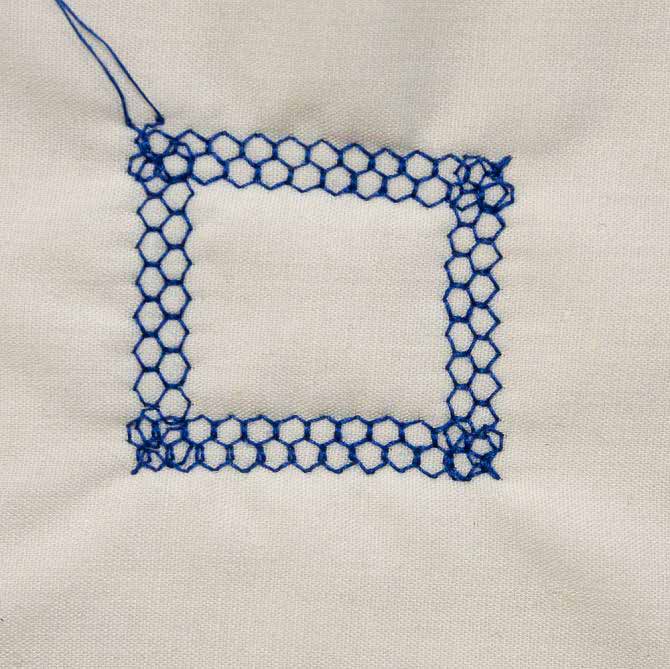
Adding the applique shapes
Last month when I started with the applique shapes, I had visions of the hexagons being connected with lines of fabric. As I placed and re-placed the shapes on the quilt to get the optimal placement of the hexagons within the design of the quilt, I changed my mind about connecting them. I only wanted the shapes to be placed on the background fabric but didn’t want to use up all of the negative space. Otherwise, the quilt would be too busy and, if I’d connected each shape, the background space would be overwhelmingly busy. Instead, I did the opposite and went with the more of the minimalist thing.
Tip: Placing the quilt sections on the large design wall made it easier to see what the whole piece is going to look like. Standing back at least 10 feet and looking straight at your work makes a huge difference when auditioning fabrics, shapes, colors, blocks, etc. If you don’t have the space to stand back and look at your work, then use a reducing glass to achieve the same effect. Taking a picture and looking at it on the camera or on a computer screen will give the same perspective.
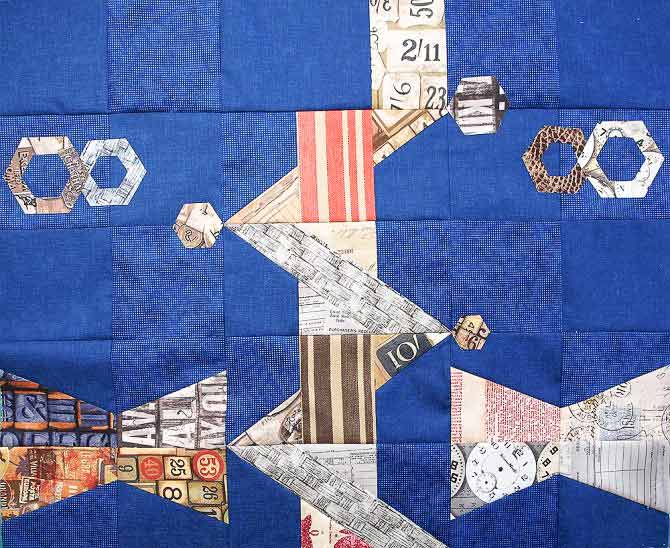
I’ve added the applique pieces to the sections I sewed together last month. The corner sections each have three hexagon rings arranged together in a straight line coming out from the snowball block. Arranging the hexagons this way creates the look of a linked chain.
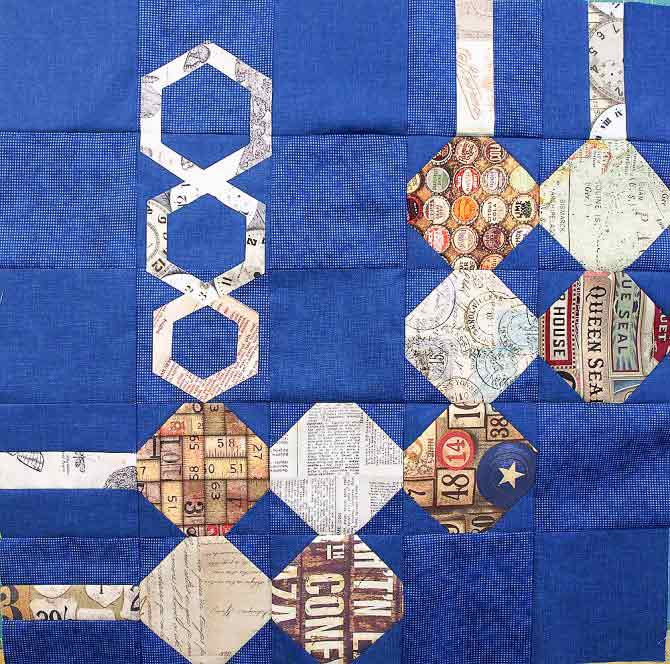
The outer edge middle sections continue the hexagon line from the snowball block, as well as, adding solid hexagons to the points of the intertwined block.
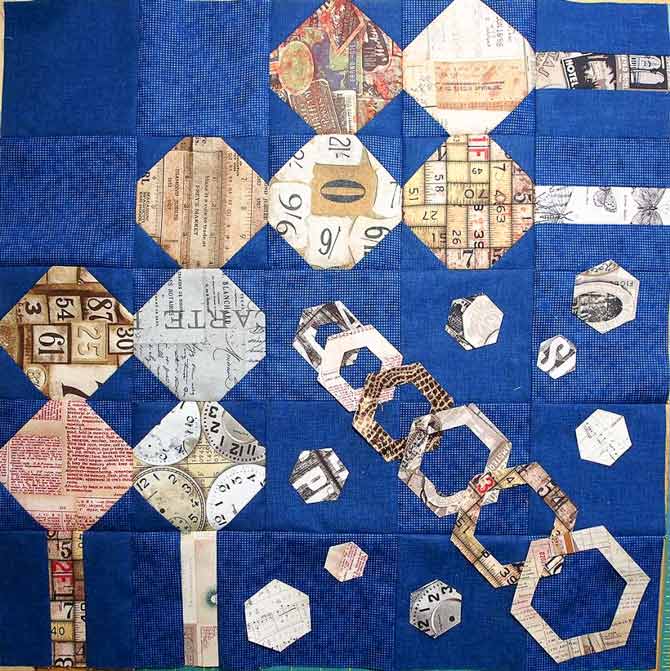
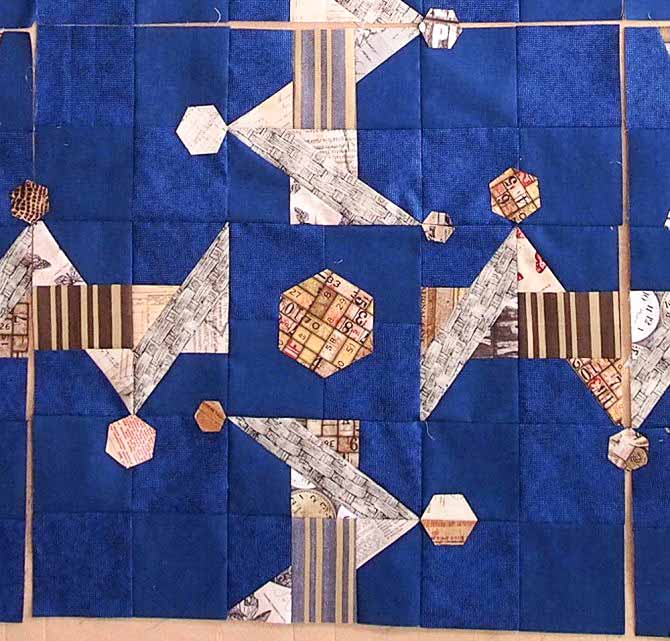
Finally, the middle section has solid hexagons added around the intertwined block and in the middle block of the quilt.
Keeping these pieces in sections rather than sewing the whole quilt together will make it easier to stitch around the applique pieces.
There’s so much the PFAFF Creative 4.5 has to offer in decorative stitches; there are all kinds of options. I’ve only touched on a small amount of what this machine can do. If I were to go through it all, we would be here all year – well, not quite, but it’s quite extensive.
I’m sure you’re wondering what decision I made for which decorative stitch to use on the applique pieces for the What’s Good For the Gal is Good For the Guy quilt challenge. I’m going to make you wait for that decision as I’ve already overloaded you with information. Today, after delving into even more decorative stitches on the PFAFF Creative 4.5, we need a rest.
Happy Quilting
2 comments