Wow! We learned so much yesterday on which piping foot to use and which cording works best with each. I love making piping, and I’ll use piping more often with my new knowledge. A little pop of color can spice up any project.
Today, I’m using the Husqvarna Viking Opal 670 to make the piping, but I’ll also be using the Husqvarna Viking Designer EPIC 2 to share something pretty cool with you.
Gather the supplies
The technique I’m showing is the same for the Clear Mini Piping Foot, the Piping Foot, and the Single Welt Cord Foot. The only difference is to match the cord size to the foot and cut the fabric strip to the appropriate width. Remember, the smaller piping is used mainly for clothing, while the thicker and usually stiffer piping is for home decor.
I’m using the Clear Mini Piping Foot, 1/16″ cord, and a strip of fabric cut 1″ wide. A good rule of thumb is to cut the fabric strip twice the diameter of the cord, plus at least 1½”. Use bias fabric strips if you’re using the piping on a curve. If you need to make a long strip of piping, join the fabric strips (or bias strips) with a diagonal seam and press the seam open.
Cutting the fabric strip extra wide allows you to trim the seam allowance. You’ll see it’s hard to get the seam allowances even, and there are rulers you can use to trim your seam allowances for more precision. The most versatile ruler lets you trim 1/16″ to ¼” piping with a ¼” or ½” seam allowance.
Let’s make piping
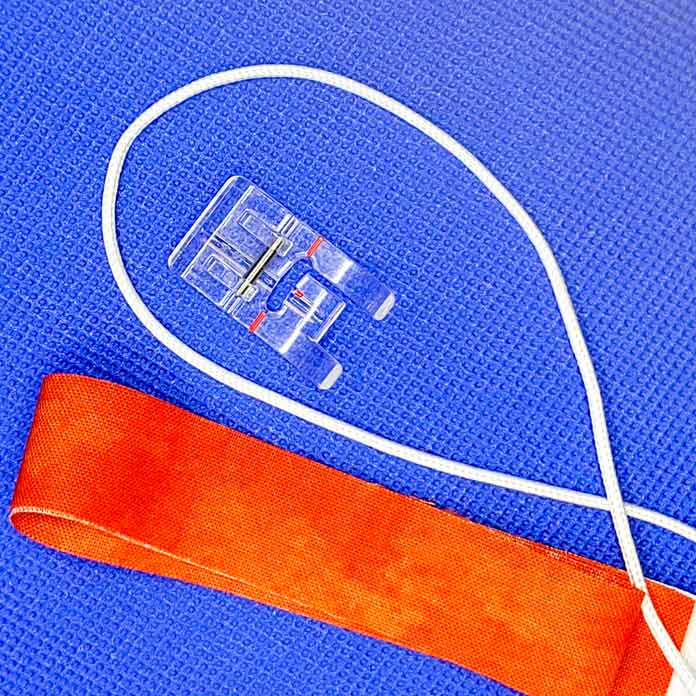
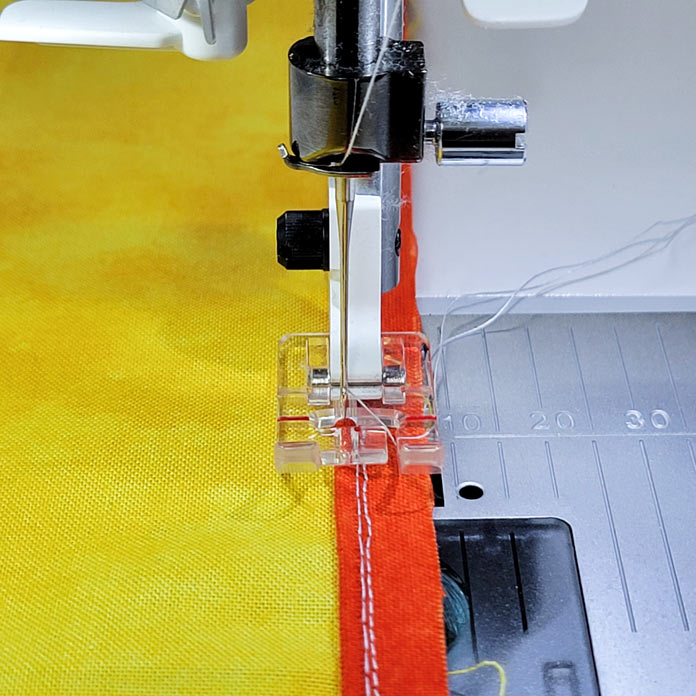
Start by attaching the piping foot to the Opal 670. Fold the fabric strip in half with the wrong sides together, and insert the cord. It helps to leave about ½” of cord extended beyond the end of the fabric to ensure it doesn’t shift within the fabric.
The first step is to secure the cord within the strip of fabric. Notice the stitching line is close to but not on the cord. It doesn’t matter which color of thread you use at this point.
Did you notice the raw edges are uneven? It’s challenging to get the fabric evenly distributed around the cord. Hence, if you start with a wider strip, there’s room to trim the seam allowance to the desired width. I find the thicker the cord, the wonkier the raw edges. Better to use a wider strip and trim than to have a wonky seam allowance.
Needle position
Here’s something else we need to be aware of – the position of our needle. I don’t want my first stitching line to be right against the cord. When I sew the piping into my project, I want the stitching line to be snug against the cord, but not right now —more in a minute. The bottom line is we need to move the needle to accommodate what we are trying to achieve.
The Opal 670 has 29 needle positions – the center needle position for basic sewing and then 14 positions to the left and 14 to the right. This feature provides us with super flexibility when we need to move the needle.
How does one move the needle? You use the Stitch Width function on the screen to move the needle to the left or right.
In this photo, the needle is in the center position.
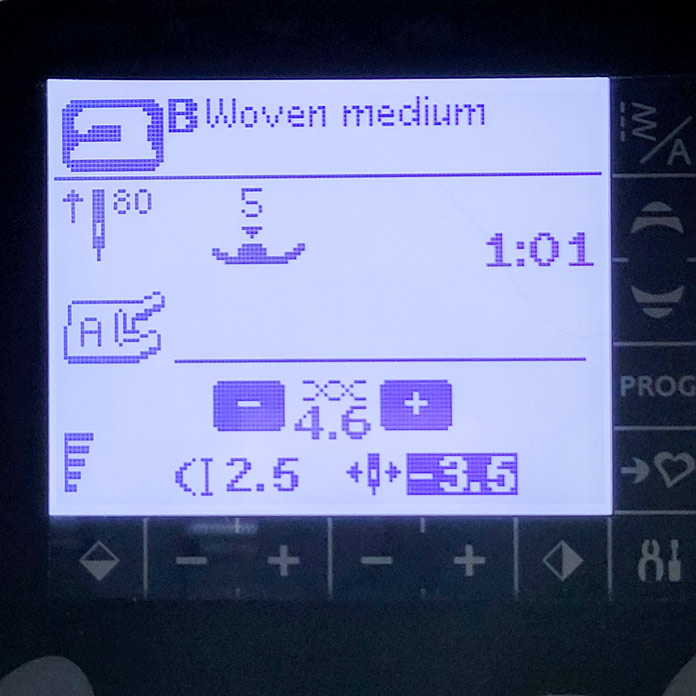
Using the Plus and Minus icons below the Stitch Width setting allows us to move the needle to the left or the right. Notice how the space around the number changes color, which alerts me at a glance that the needle is no longer sitting in the center position. Super easy to identify. I love that. If I am going to use this same setting for another project, it might be a good idea to take note of the setting or add it to the notes you’ll keep for using the piping feet. Alternatively, you can save the settings in one of the memory slots.
If you’re working with a stitch that has a width to it, say a zigzag stitch, you can still move the stitch to the left or the right, but the amount of movement to the left or right will also be affected by how wide the stitch is. You can’t exceed the maximum stitch width of your sewing machine.
Now let’s sew the piping into a seam. This technique works for all types of seams and all three piping feet. Tomorrow, I’ll show you how to start and stop a continuous piped seam and how to handle turning corners.
Depending on your skill level and your project, you may want to baste the piping in place before you add the second layer of fabric. Why would I baste? If there are a lot of curves or tight areas, or corners, I want to ensure that the piping is well positioned, so there are no surprises when I do the final seam.
I’ll baste the piping in place using the appropriate piping foot, and if you want to get a little closer to the piping cord, move the needle one more notch to the left. Use a basting stitch (length of 4.0) if you prefer.
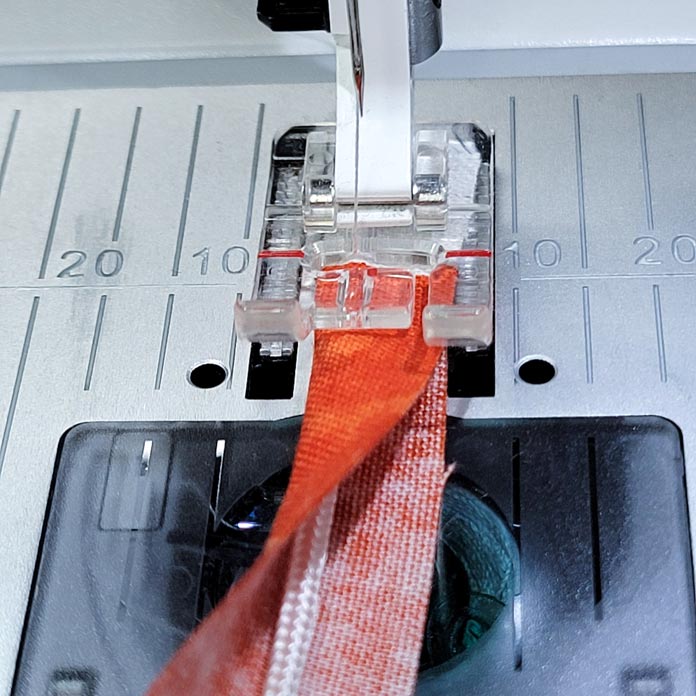
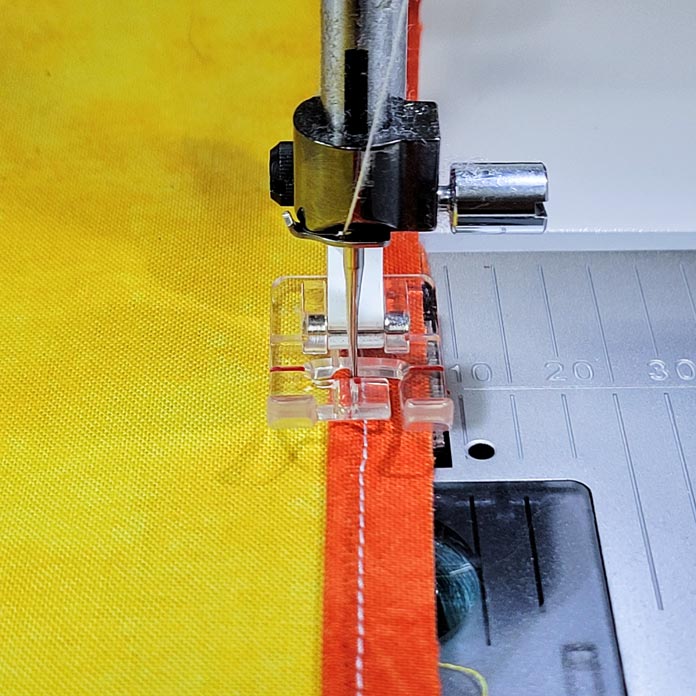
Line the raw edges of the piping along the raw edge on the right side of your base fabric and ensure the cord is in the groove on the underside of the piping foot.
When I stitched the cord into the piping fabric, the needle was already reasonably close to the cord, so when I basted the piping to the base fabric, I moved the needle only one position to the left. Sometimes, this gap is larger, or the line of basting stitches may be right on the first line of stitching.
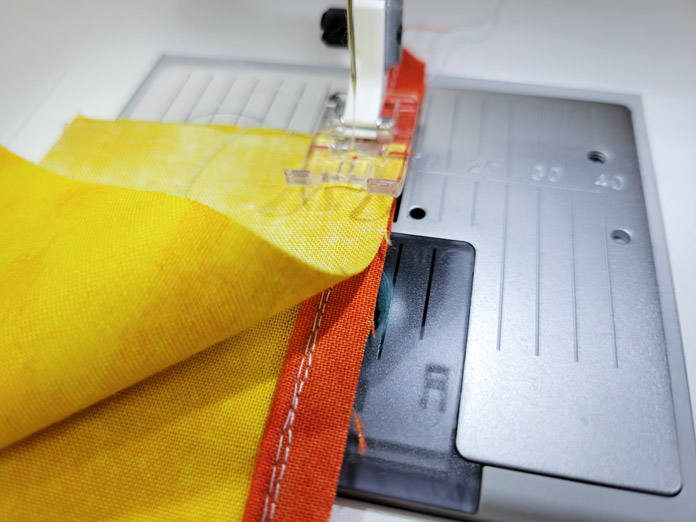
Check that the piping is where you want it to be along the edges, curves, or corners. If things are good, it’s time to add the second layer, sandwiching the piping between the two layers of fabric.
You’ll use your piping foot again to sew this seam. Remember, the cord will run along the groove in the bottom of the foot to ensure a nice even seam. This time, position the needle so the stitching line is snug against the cord but not sewing into the cord. If you sew into the cord, this increases the bulkiness of the seam allowance, and you don’t want that. It also makes the piping appear uneven on the right side.
Here’s a picture of the needle in the center position.
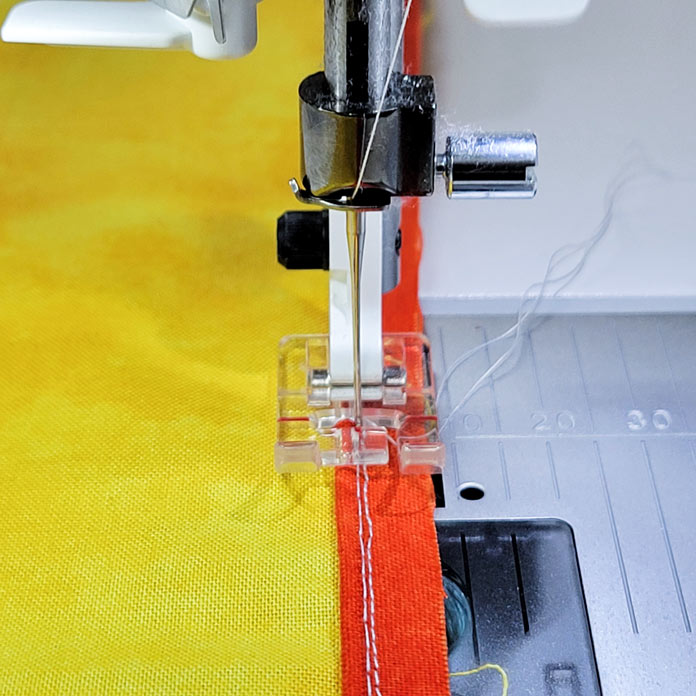
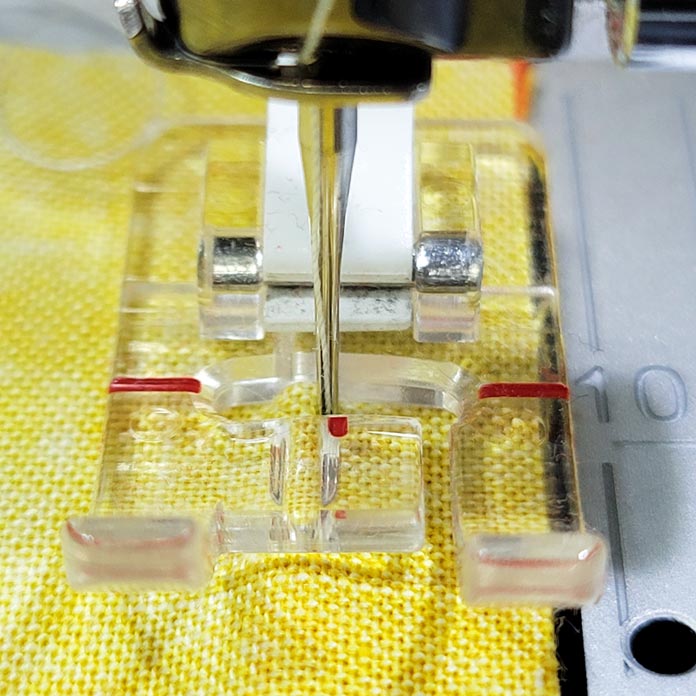
Here’s the needle several positions to the left. This needle position is too far to the left to sew the seam properly, as the stitching line will fall right on the piping, but you get the idea of how and why we can position the needle.
The last thing to do is to sew along the seam. The groove keeps the cord in the correct position, and since it’s basted to the base layer, the layer also stays put. All we need to do is ensure the raw edge of the new piece of fabric lines up with the raw edge of the piping and the base fabric.
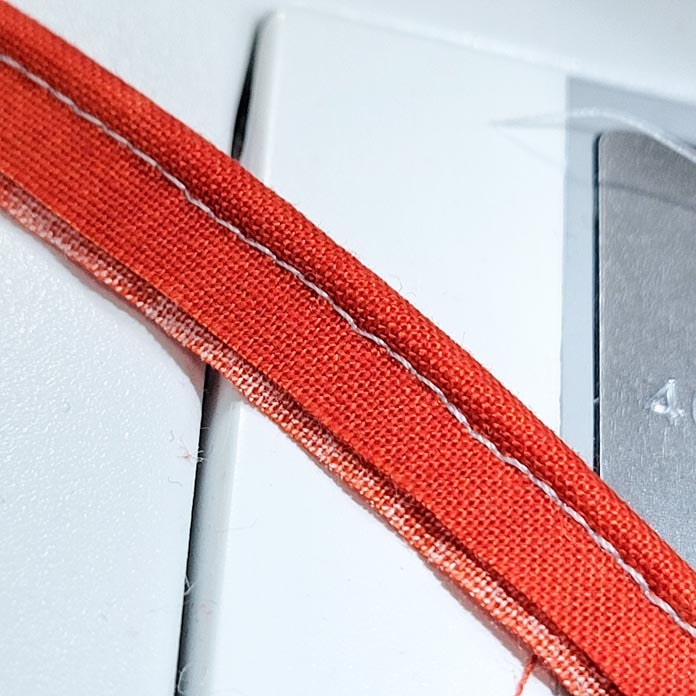
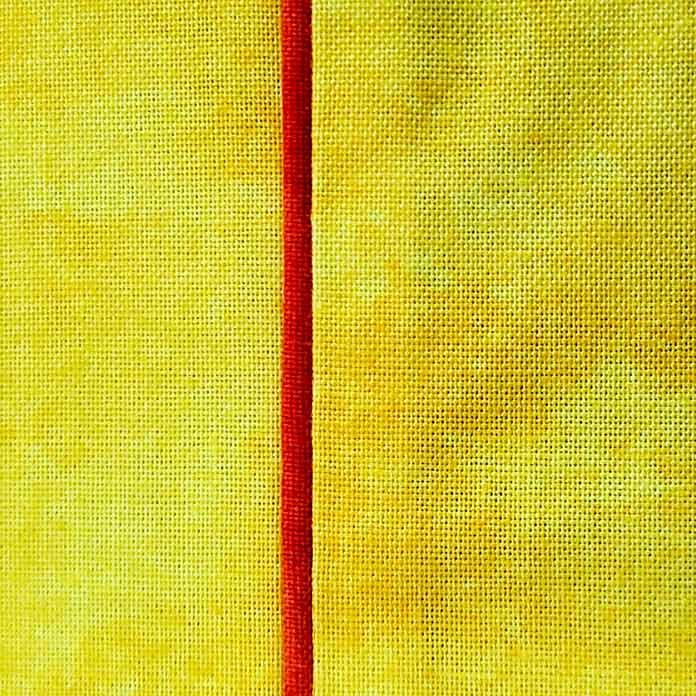
Here’s the completed seam with piping. If you were careful with the needle position, your piping will be even, and none of the threads should show on the right side. If you’re having difficulty, you may want to sew the final seam with matching thread.
Press the seam allowance to one side depending on the project. Try to not flatten the cord, so carefully press along one side. A wool pressing mat comes in handy as it helps to cushion the round shape of the piping without it getting crushed on a flat pressing surface.
And that’s how easy it is to make and insert piping. As I mentioned earlier, I don’t have space to incorporate corners and stopping and starting techniques, so check out tomorrow’s post.
A tip for the ‘tips’
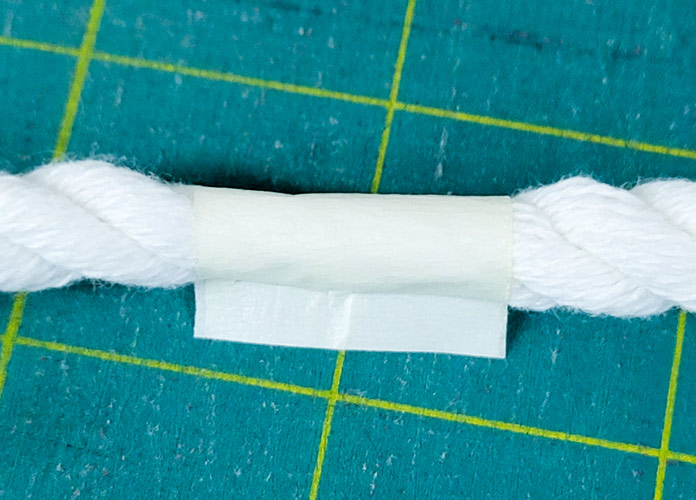
Here’s an essential tip for your piping cord. The ends of the cording can start to unravel and fray quite badly, even when stored neatly in a plastic bag. When you purchase a cord, secure both ends with a piece of masking tape.
When you cut the cord, place a piece of tape where you’ll cut it. Then slice the cord through the middle of the tape, and both ends will be secure!
Beads and piping?
Do you want to jazz up your piping? Look at this next project, which I must try. I’m moving over to the Husqvarna Viking Designer EPIC 2, which has Wi-Fi connectivity.
Once you’re connected to the internet in the comfort of your home and have a mySewnet account, you’ll have access to the mySewnet blog. Now, what does all this mean?
Well, mySewnet is a relatively new ecosystem of information sharing, embroidery software, transferring and storing embroidery files, and much more. I wrote a post about it a while back. The website and tools evolve daily, but this will give you a good overview.
One of the fun things about having a free mySewnet account is accessing the mySewnet blog. Keep in mind the blog is available directly on your Wi-Fi-enabled sewing machine, such as the Designer EPIC 2.
You’ll get tips, inspiration, project files, embroidery motifs, and news on the blog, and it comes right to your Wi-Fi-enabled sewing machine.
Look at this project that showed up on the blog several months ago.
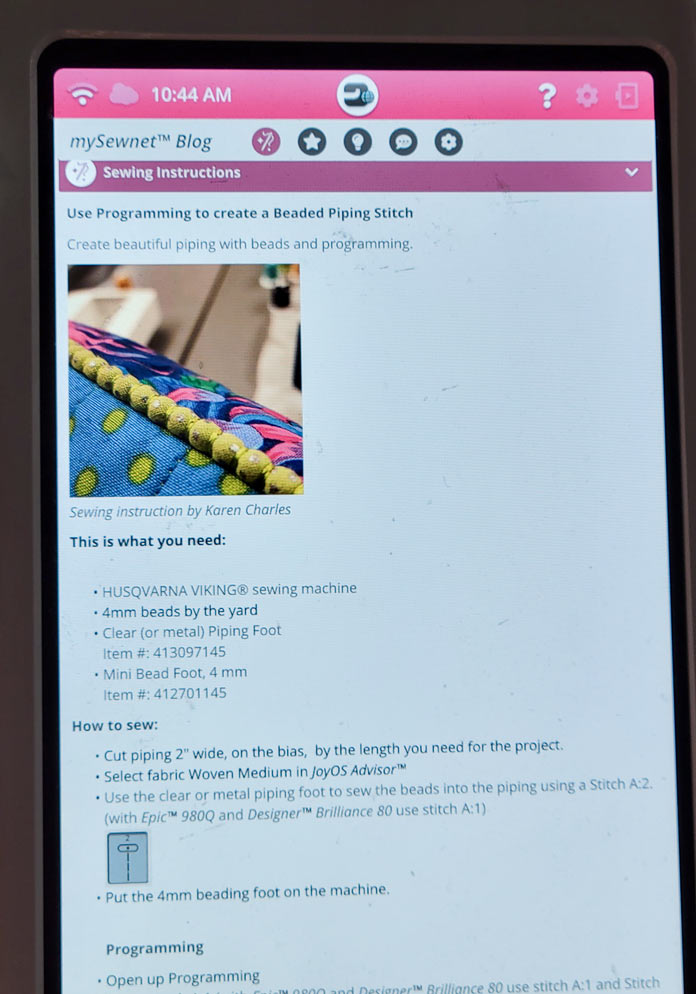
OH – I have to try that. Imagine using beads as the piping cord to get a different look? If you have a Wi-Fi-enabled Husqvarna Viking sewing machine, check out the sewing instructions to find this post. It’s several posts back in the Sewing Instructions tab.
WOW – that’s so fun to get tips or techniques directly through the blog to the Designer EPIC 2, or another Wi-Fi enabled Husqvarna Viking sewing machine.
Well, I think that’s enough excitement for today! I’ve made piping before, but I’ve learned so much this week that I have lots more I want to do! And the week isn’t even over yet!
Dig out your piping feet and some cord. Take stock of what you have and then start to experiment. It’s the only way to learn.
Tomorrow, we’ll investigate how to start and end the piping for continuous lines of piping, and we’ll look at several different ways to go around corners.
And don’t forget to check out the Husqvarna Viking Opal 670 or the Husqvarna Viking Designer EPIC 2 for all the fantastic features.
Have a great day!
Ciao!!!!
This is part 3 of 5 in this series
Go back to part 2: Piping vs welting – What’s the difference? Which presser foot works best?
Go to part 4: Piping around corners and seamless joins (EASY tutorial)