Wow, the week is almost over and I still have so much more I want to share with all of you about color. Today though is going to be about creating another cushion cover. This one is going to be made using a triadic color scheme and triangles. And as I’ve been doing all week I’ll be adding some contrast to this little project. Have you heard of Stitch-N-Steam? If yes that’s great you know how much fun it is and if not then you’re going to find out how much fun it is. Using Stitch-N-Steam is as simple as 1-2-3.
Let the fun begin.
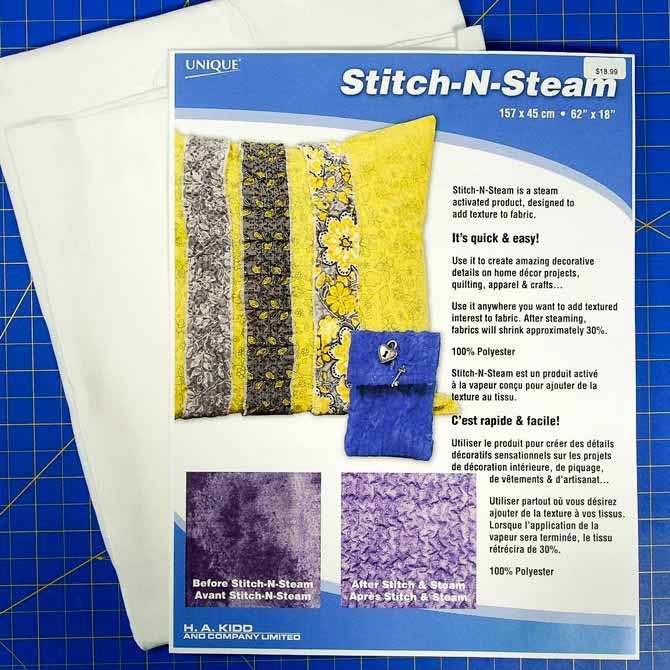
What is Stitch-N-Steam
Stitch-N-Steam is a 100% polyester product that is activated by steam and used to add texture to any piece of fabric.
Spice up the life of a boring fabric. Add texture to home decor projects. Use it to add contrast to your quilts. Create interesting craft projects with it.
It’s as simple as 1-2-3.
How does it work?
It’s activated by steam. As the polyester fabric is steamed, it and the fabric shrinks together creating texture. Overall shrinkage is approximately 30%. Make sure to take this into account when cutting your pieces.
Time to play!
Simple as 1-2-3
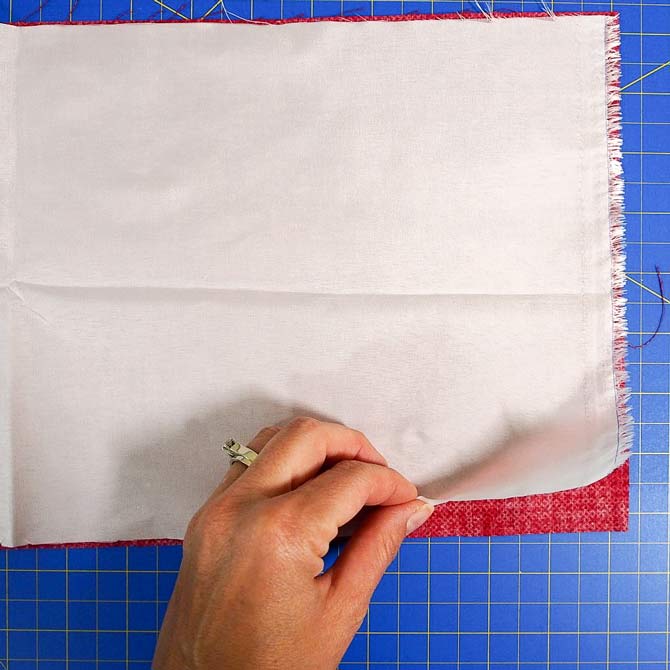
Step 1 – adding Stitch-N-Steam to the fabric
Place a piece of Stitch-N-Steam on the back side of a piece of fabric.
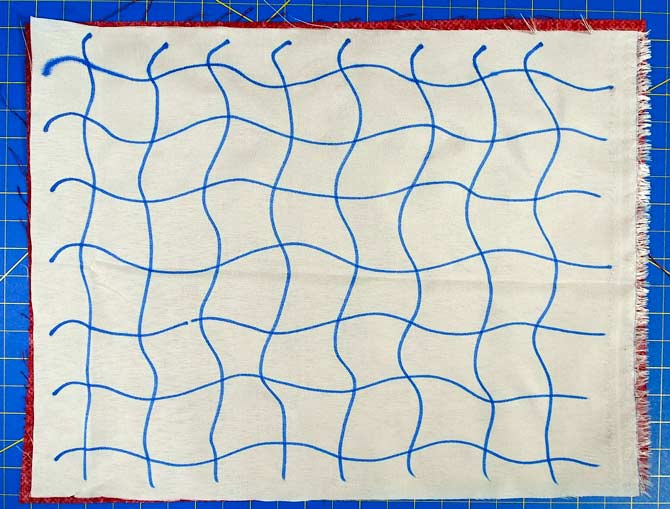
Stitching lines can be drawn on the polyester fabric if you need guidelines to stitch by. I just used a marker to draw the lines since they won’t ever be seen.
Depending on the size of the piece being stitched a couple of pins may be needed to hold the piece together as the polyester is quite slippery.
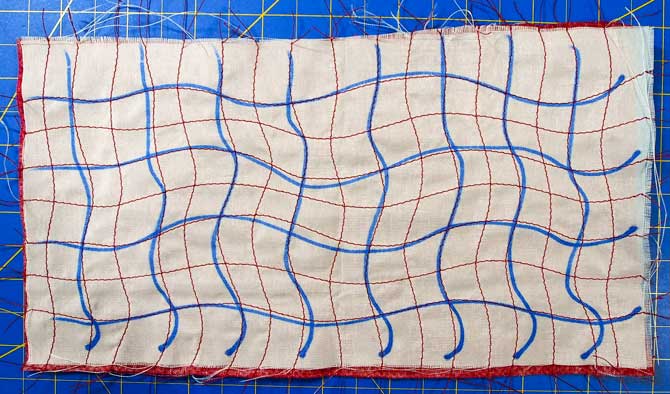
Step 2 – stitch the two pieces together
Any stitch can be used – straight line stitching or free motion stitching.
Any type of thread can be used for the stitching. Just make sure to use the same thread in both the top and bobbin of the machine especially if you’re going to stitch with the Stitch-N-Steam facing up.
I decided to use a polyester thread in the solid color to match each fabric but a variegated thread would look good too. The thread I chose will blend right in.
The closer the stitches are together the more texture there will be. Multi directional lines will give better texture.
I stitched along the blue grid lines but then decided that they were too far apart and stitched between each one to get better texture.
Step 3 – activate with steam
Once the stitching is done place the piece on the ironing board with fabric side up as per the manufacturer’s instructions. Hold the iron just over top of the fabric – do not press just let the steam do it’s thing. The iron should be on the highest steam setting for optimal results. I tend to press the extra steam button for more steam. As the steam is applied to the fabric, it shrinks and crinkles, and adds texture to a once flat piece of fabric.
Isn’t that just too cool?
I’ve got a couple of bonus tips for you when using this product. Here they are.
Bonus Tips
Tip #1 – add extra loft
Do this by putting a piece of 100% cotton batting between the piece of fabric and the Stitch-N-Seam. When stitching the three layers together make sure to have closer stitching to ensure good shrinkage and texture.
Tip #2 – use a cooling rack
In step 3 above the Stitch-N-Steam instructions say to steam with the fabric side facing up but I like to apply steam with the Stitch-N-Steam product facing up. The only problem is that if the iron touches the polyester fabric it will melt hence I had to come up with a solution to prevent melting and optimal steaming. Someone suggested I place a cooling rack for cookies on top of the piece so I could have the Stitch-N-Steam facing up. Using the cooling rack means that I can get the iron close to the fabric but not touch it and optimize the steaming and shrinking process.
By the way, Stitch-N-Steam is completely washer, dryer and dry-clean safe so if you’re embellishing a piece of clothing you’ll be able to wash it.
This is so much fun. I can’t wait to get the rest of my fabrics textured for my cushion top. With the red piece done I can move onto the blue and yellow. And then put it all together tomorrow to create another fantastic project for my color series posts.
No ‘ifs’, ‘ands’ or ‘buts’, using Stitch-N-Steam is as simple as 1-2-3. Happy Quilting!