Yesterday, I cut out the fabric squares for the windmill design quilt using these three rulers:
· OLFA 121⁄2″ Square Frosted Acrylic Ruler
· OLFA 6″ x 12″ Frosted Acrylic Ruler
· OLFA 6″ x 24″ Frosted Acrylic Ruler
The cutting was made easy using the OLFA 45mm Splash™ Handle Rotary Cutter.
With the HeatnBond Non-Woven Lightweight Fusible Interfacing cut and fused to the wrong sides of the fabric squares, I’m ready to cut out the circles I’ll use to create the block’s half-circles.
To make perfect circles, I’ll use the OLFA Rotary Circle Cutter.
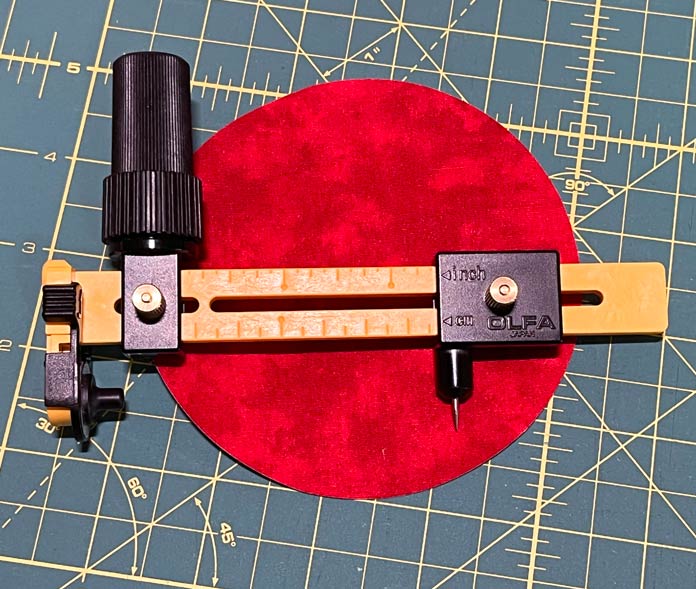
The OLFA Rotary Circle Cutter comes out of the package pre-set to cut a circle no larger than 8¾” in diameter.
This quilt block uses circles with diameters measuring 4”, 5” and 10”. The cutter settings need to be adjusted for each different circle size. It’s simple and safe to make the size adjustments.
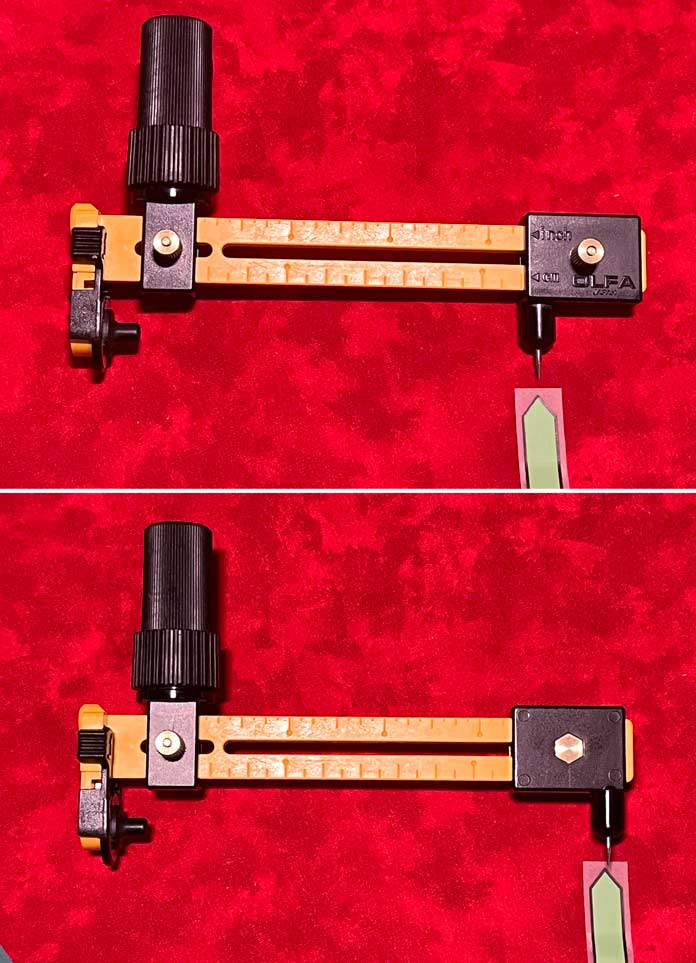
Start by removing the brass pin found above the pivot spike and rotate the spike unit 180º. Rotating the pivot spike enables to cutter to make circles up to 10¼” in diameter.
To cut 5” yellow circles, adjust the cutter to the 2½” mark. Place the pivot spike at the intersection of the X drawn on the paper side of each fused HeatnBond square. Press down into position, firmly grip the ratchet holder and rotate the cutter to cut out the circle.
Note: If this is your first time using a circle cutter, I suggest making a few test circles using scrap fabrics first. This is an easy way to get a feel for how the circle cutter works.
Cut (8) 5” circles; repeat the above steps above to cut (8) 10” circles from the red fabric squares. Adjusting the circle cutter to 5” will cut a 10” circle.
To reduce bulk when fusing multiple fabrics to each other, I decided to cut a smaller circle from the middle of the 10” red circles. This will be helpful when the yellow half-circles are fused to the red half-circles. Stay tuned.
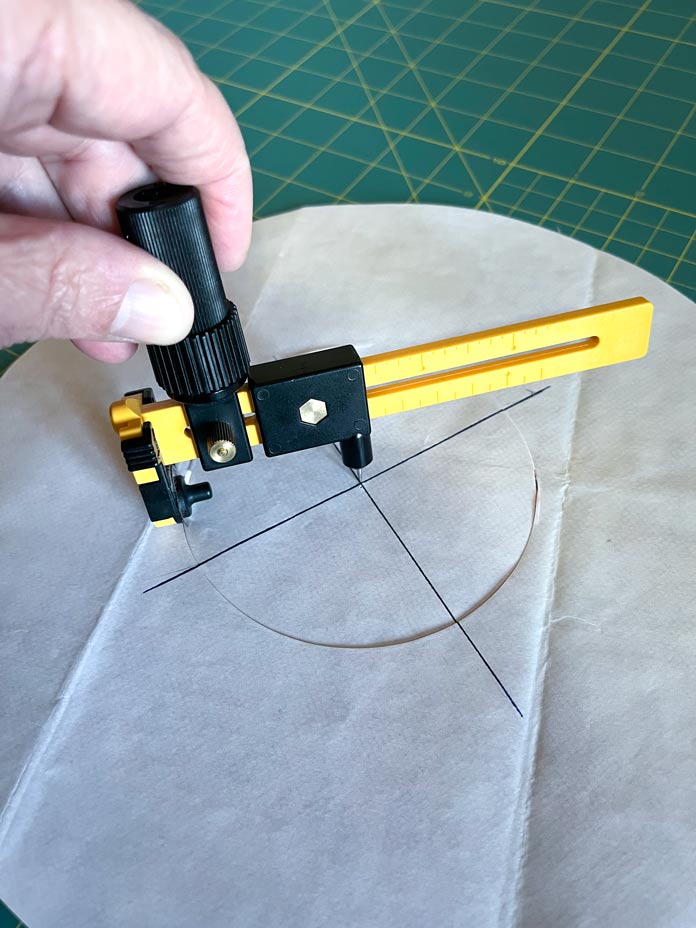
I’ve adjusted my rotary circle cutter to 2” between the blade and the pivot spike. This will make a circle 4” in diameter.
TIP Ensure at least one of the marked lines extends beyond the diameter of the circle.
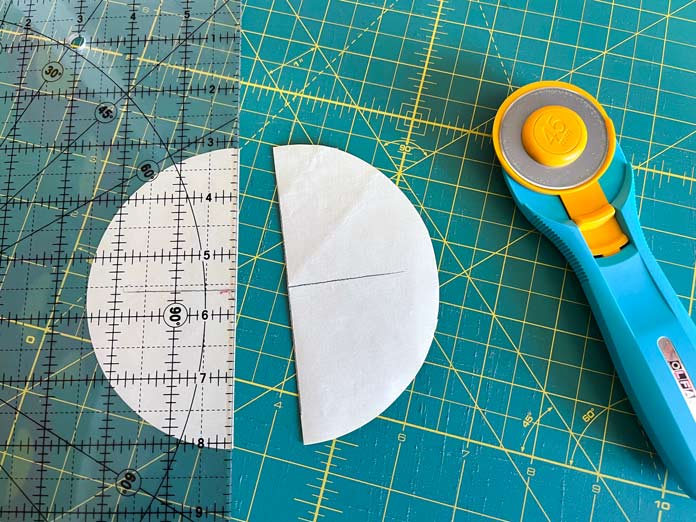
On each of the yellow circles, line up the edge of the OLFA 6″ x 12″ ruler on one of the lines drawn to mark the X on the paper. Cut the circle into two half-circles.
Repeat the above steps on the eight red circles to create half-circles.
Using the OLFA Rotary Circle Cutter to make circles was easy and fun. This is the one and only time when going around in circles doesn’t give me a headache!
With the circles and half circles complete, we’ve completed today’s work on this quilt project. Come back tomorrow when I’ll show how to put the blocks together.
This is part 2 of 5 in this series
Go back to part 1: Make perfect cuts with OLFA rulers
Go to part 3: Three critical tips for fusing (ask me how I know!)