It’s a new year, which is always an exciting time for me! There’s so much I want to sew and sew little time to make it happen. It’s also a time to make lists and set goals.
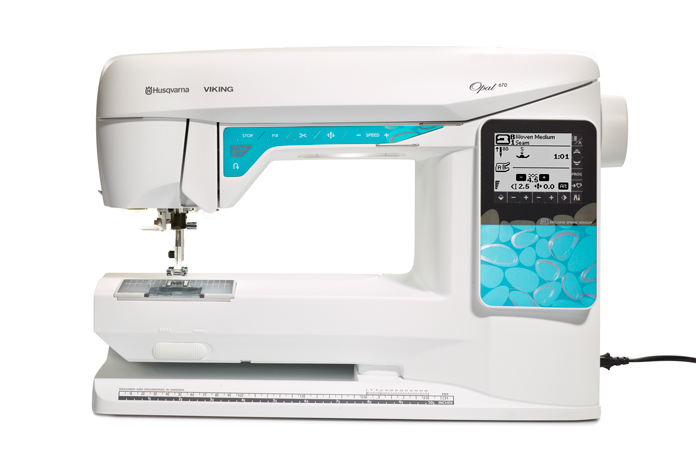
Good tools and planning are essential to getting it all done, but most of all, we need a fantastic sewing machine to make our work shine. This week, I’ll be test driving the Husqvarna Viking Opal 670 computerized sewing machine.
The Opal 670 is an ideal sewing machine if you’re starting out and not sure how much you’ll sew, or if you need a second machine to take to your sewing retreats. It’s lightweight, making it very portable, yet it’s got a lot of fantastic features on it, which we’ll explore this week.
It also comes with a hard case, so the machine is well protected if you travel with it.
Today, we’ll look at a couple of features, and I’ll chat about chain piecing with the Opal 670. I have a different style of piecing to share tomorrow, and I’ll show you how the tools of the Opal 670 help with that technique. Later this week, we’ll look at ways to use the decorative stitches and check out some optional presser feet.
Sew much to do, sew much to see! Let’s get started!
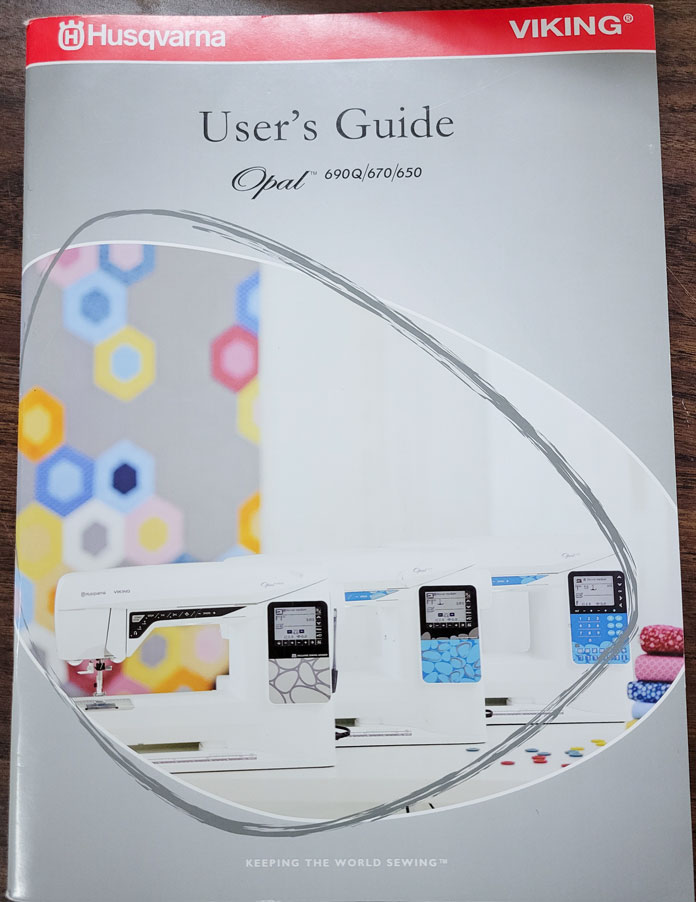
The first thing we should do is check out the User’s Guide. It’s not too thick, and it covers all three sewing machines in the Opal series, with the Opal 670 in the middle. Check the comparison charts online or visit your local Husqvarna Viking dealer.
I recommend you start with the machine overview in the User’s Guide to learn all the sewing machine components. It’s a good idea to know what the presser foot ankle is or where to find the On/Off switch, for instance!
You’ll find a list of all the included accessories and presser feet. The information is clear and easy to read, and this knowledge will help you become a better sewist!
The Opal 670 has 200 Utility and Decorative stitches, which you’ll find when you open the lid of the sewing machine. More on the stitches in a moment.
I think it’s extremely important to read the Stitch Table of Utility Stitches (Menu 1). I’ve been sewing for a long time and was confident that I knew how to use all those Utility Stitches. Imagine my surprise when I read the list and realized I wasn’t as bright as I thought I was!
Here’s the thing – you won’t remember all the information, nor should you have to. But knowing where to find the information is essential.
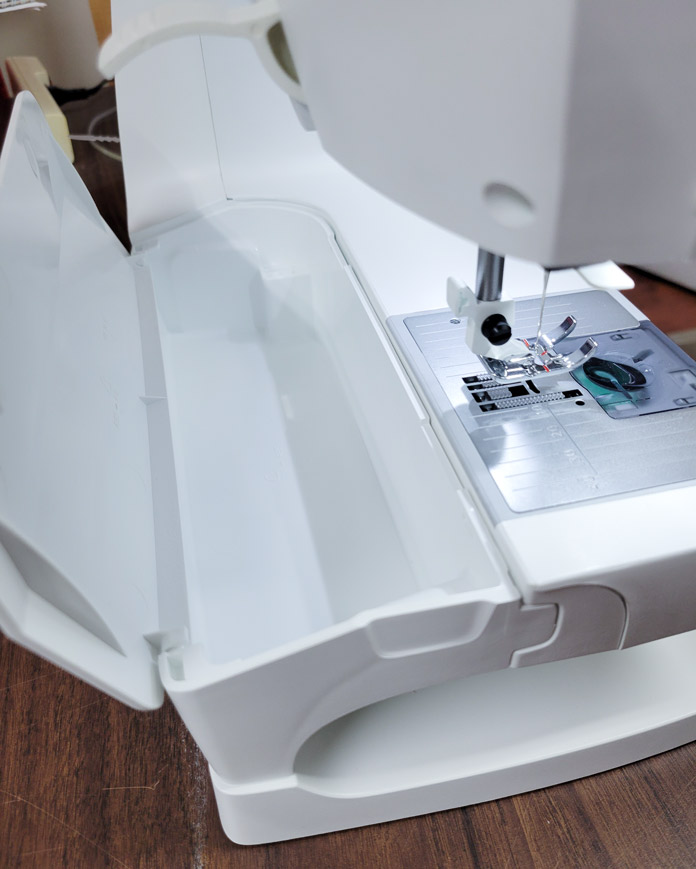
I don’t know about you, but I want to sew! So, let’s get the machine out of the box and set up. There’s an accessory tray in the back of the sewing machine to store all the accessories.
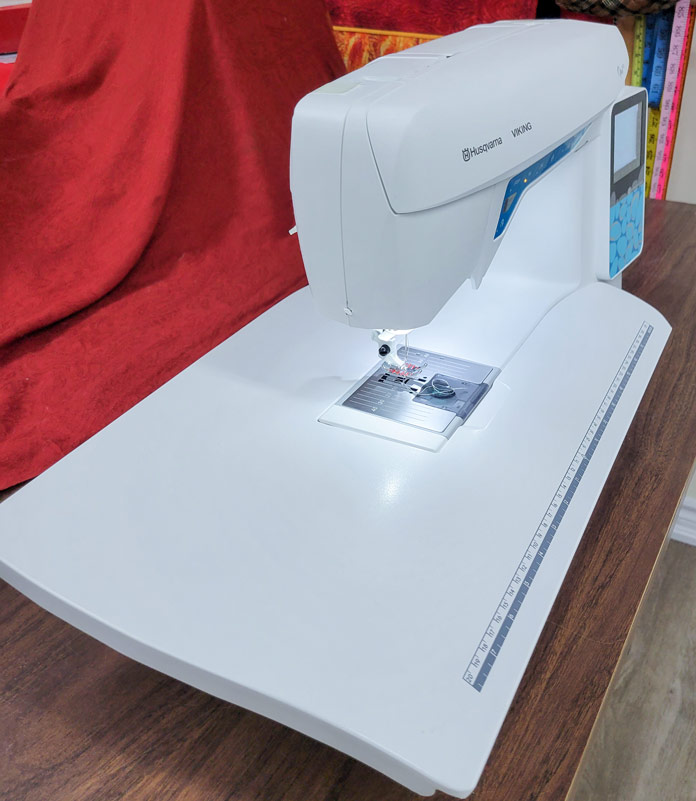
As you can see, there’s ample room to the left of the needle to sew, but I’m a space snob, and I love to have extra space if I can. That way, when I want to work on something large or do some quilting, the project isn’t falling off the left edge of the sewing machine.
One of the first things I do is remove the accessory tray and add the optional extension table. It’s such an elegant extension table, and it adds so much space to work. I love the curved front as it allows the larger pieces I’m working with to easily glide over the front of the machine.
There’s space under the extension table to store the accessory tray, so your supplies are never far away.
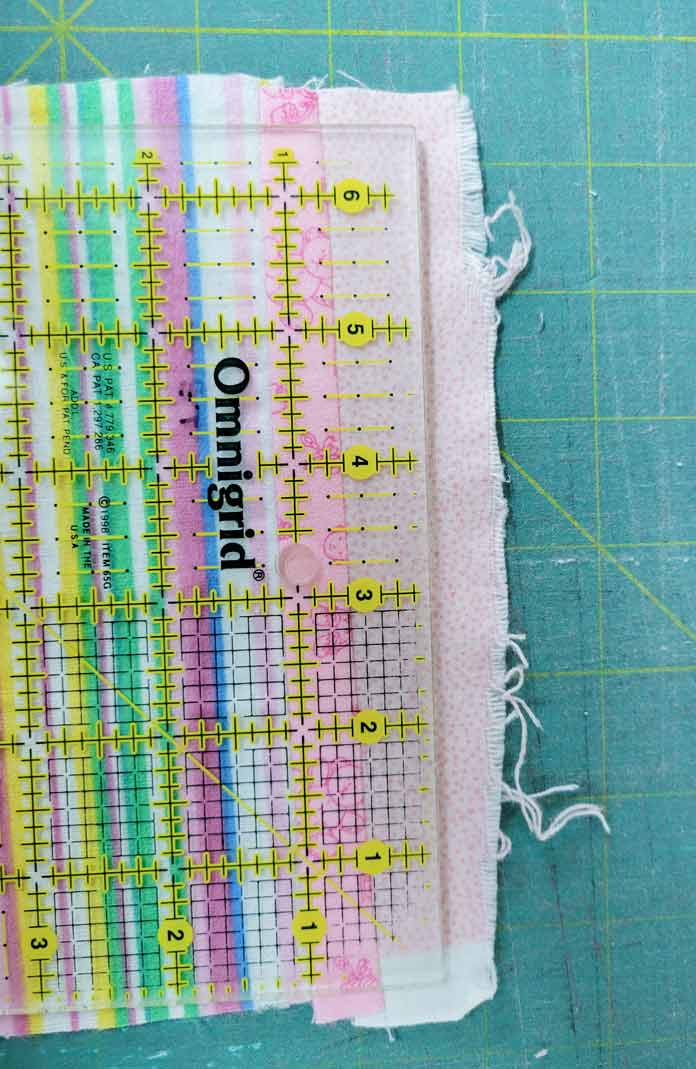
I love having the long ruler along the front of the extension table. There’s also a ruler along the front of the sewing machine, but it’s hard to access once the extension table is in place and it’s not as long. For the improv piecing style I’m sharing with you today, the ruler is a handy reference to see how large your blocks are.
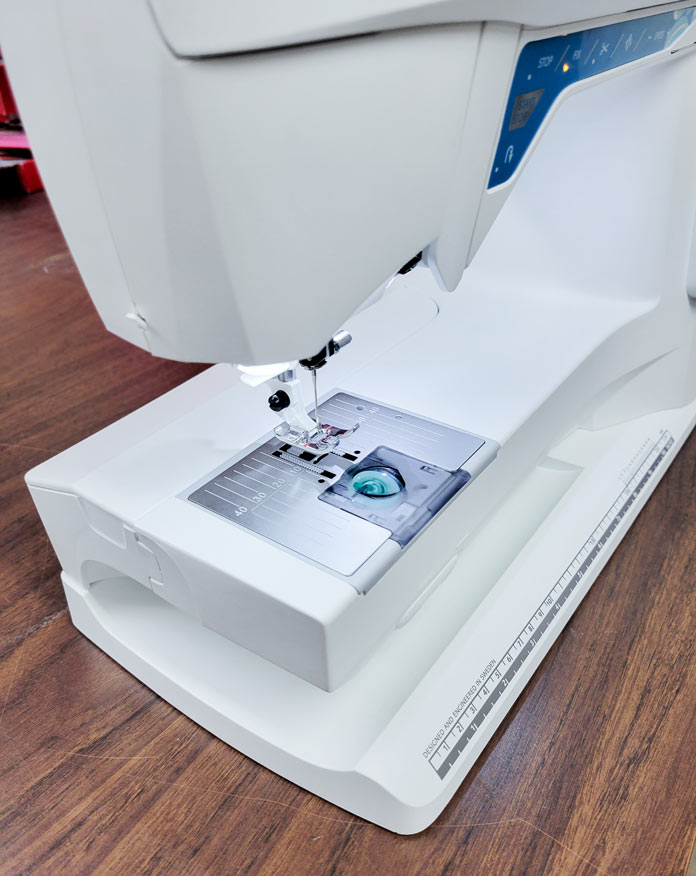
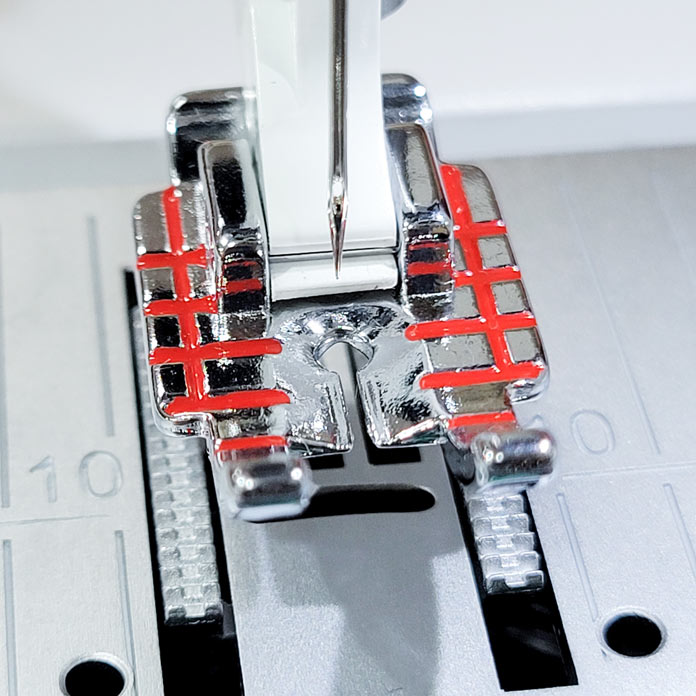
When you take the Opal 670 out of the box, you’ll find the Utility Foot A attached. You also get the Quilter’s ¼” Piecing Foot P with the sewing machine, which is ideal for achieving a perfect ¼” seam allowance. I love this presser foot for two reasons:
- The presser foot is interchangeable with most other Husqvarna Viking sewing machines. That means it’s the presser foot, not a setting on the sewing machine, that guides you in achieving your ¼” seam allowance. So, while sewing the same project on different sewing machines was once frowned upon, it no longer matters when you use the Quilter’s ¼” Piecing Foot P on other Husqvarna Viking sewing machines. I love it and would recommend one of those feet for every Husqvarna Viking sewing machine you own!
- The red markings on the presser foot can help with your piecing accuracy, especially when pivoting around corners or starting in from the edges of your fabric.
If you prefer, there’s a ¼” stitch (Menu 2, Stitch 1) if you wish to use the Utility Foot A.
How you line up your fabric with the edge of the foot depends on the thickness of the material (flannel is thicker than cotton), the weight of the thread, and other possible factors. If you want to test your accuracy, read my earlier blog post, How to test to get an accurate ¼” seam allowance.
Inside the lid, you’ll find all the stitches built into the Opal 670. There’s a lot of decorative stitches, and we’ll be playing with them later this week. In total, there are 200 stitches, including stitches to use with the tapering function, a proper satin stitch (I’ll talk about it later this week), multiple buttonholes, four fonts, and a whole lot more.
It’s easy to choose a new stitch using the Stitch/Font Menu on the touch screen.
The Opal 670 has a fantastic Touchscreen, from where you’ll set the options for each stitch. You’ll love this feature. Simply touch the screen, and the options pop up!
In addition, you’ll find the Exclusive Sewing Advisor. The default is Woven Medium, and the technique is a seam. Based on those selections, the sewing machine will choose the most appropriate stitch, the stitch length, the tension, the needle size, and the presser foot. It’s brilliant, and if you’re a new sewist, this is a handy feature. In the Exclusive Sewing Advisor, you’ll find fabric options including woven, knit, vinyl, and the weight as well – heavy, medium, or light.
All the critical information appears on the touch screen, including the stitch length (2.5), the needle position or the stitch width (currently the needle is in center position), the tension (4.6), the recommended presser foot, the recommended needle, the chosen stitch, the speed level, and the presser foot pressure. The User’s Guide comes in handy if you’re new to a computerized sewing machine, as you need to get familiar with all those features so you can use them to their fullest potential.
You’ll note there are functions to the right and bottom of the touch screen. Those are also activated by touch and can change the settings on the screen, mirror stitches, program and save your stitch sequences, load a new stitch, and provide access to the settings menu. We’ll be diving into some of those categories throughout the week.
Let’s not forget the needle threader, which is very easy to use and very handy for those of us with aging eyesight, not that any of us would admit to it!
Note: The hook on the needle threader will not fit into Size 60 needles (the smallest available for the domestic sewing machine), so if you can’t thread those small needles by eye, just don’t buy them!
Today, I’ll show you how to create a scrap quilt, and offer some tricks to make the job more manageable. It’s the New Year, and we’re all about decluttering, starting a new project, or using up scraps so we can create something new.
I’m diligent about keeping my scraps sorted throughout the year, and I ended up with a bag of pink flannel scraps. I cut the scraps (regardless of width) into lengths of about 7″, and I grouped the fabrics in little piles beside the Opal 670.
Now I grab two pieces (each of a different fabric) and start sewing them together. When I get to the end of the seam, I grab the next pair and keep sewing. This technique is called chain piecing. There’s no need to anchor the ends of the seam, and because I’m working with flannel, which is a bit thicker than quilting cotton, I’ve left the Exclusive Sewing Advisor on Woven Medium which gives me a stitch length of 2.5.
You can see the pairs of fabrics in a long string at the back of the sewing machine.
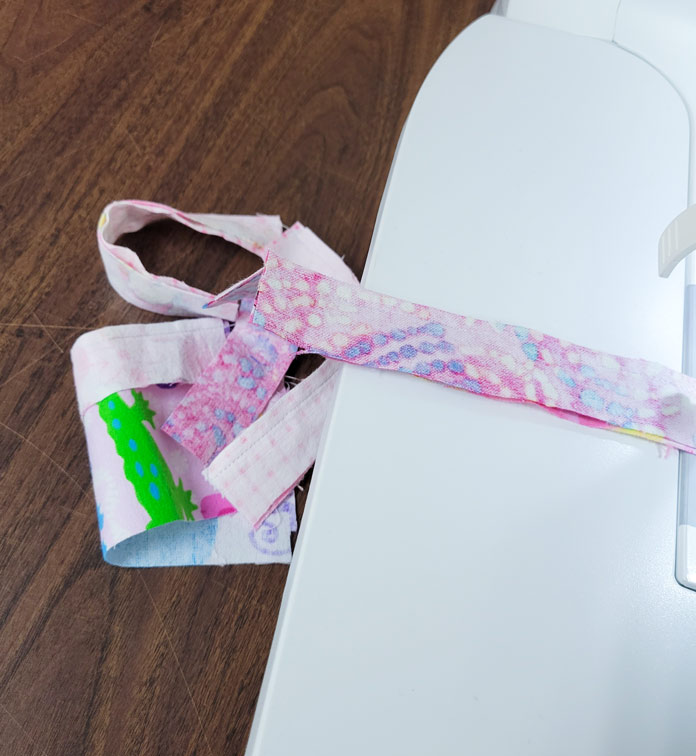
I also engage my needle down whenever I’m sewing. If I need to stop in the middle of a seam for whatever reason, the needle keeps my fabric in the correct position.
When you want to add the next set of fabrics to sew, the presser foot is sitting firmly on the stitch plate, and if you try to force the fabric under, the top layer will shift. It isn’t a big deal with the scrap quilts because you’ll trim the blocks, but you don’t want any shifting for something more precise. To prevent shifting, raise the presser foot (using the presser foot lever at the back) ever so slightly so the next pair of fabric pieces can be positioned right in front of the needle. The trick is to slightly raise the presser foot to allow enough space for the fabric to be positioned right up to the needle.
I don’t get too fussy on which fabric goes beside which. It’s a scrap quilt, and this is an excellent exercise for anyone to do! We get so caught up in matching fabrics, so I find randomly sewing scraps together is therapeutic and freeing. We quickly learn that fabrics don’t have to be perfectly matchy! And what better project to take to a quilt retreat or when you’re on Zoom with your sewing friends. It’s tough to make a mistake, and if you’re still learning how to achieve a perfect ¼” seam allowance, this is an excellent project to help you get comfortable with your new Opal 670.
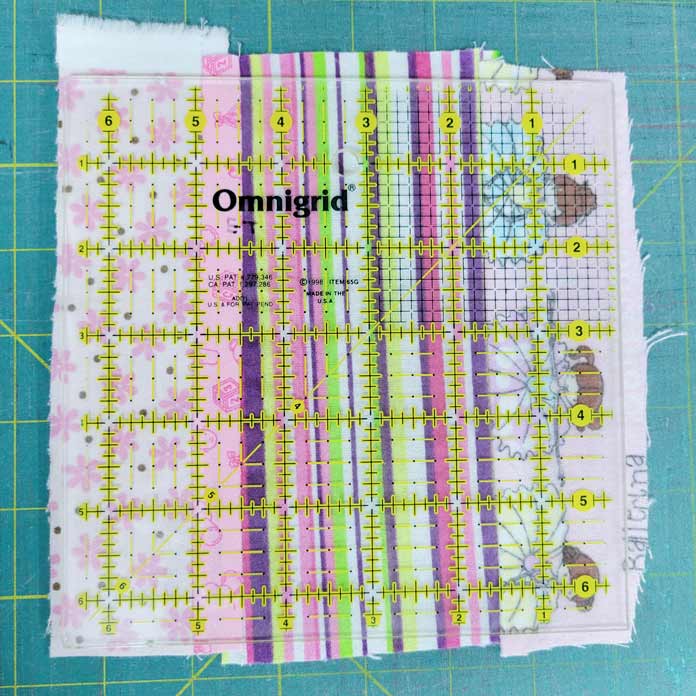
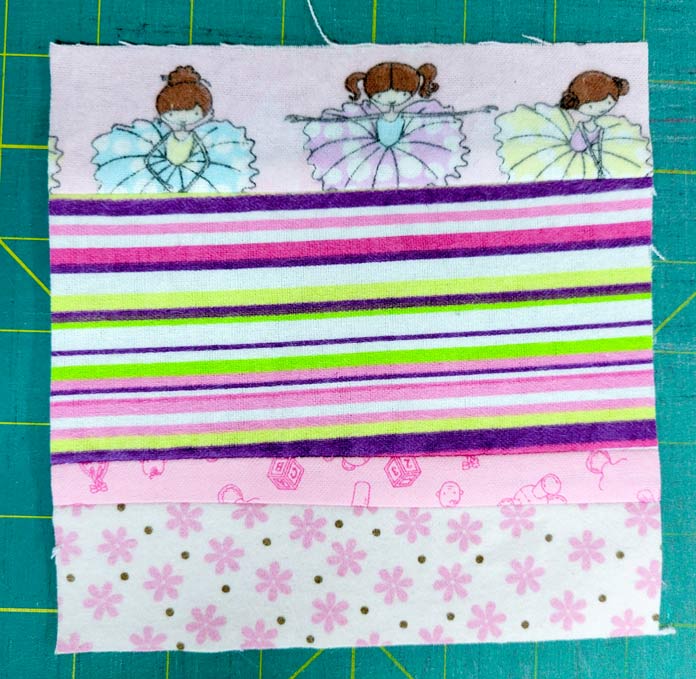
Continue to sew the strips together so you can cut a 6½” block (or choose any block size you want). A 6½” block happens to be my favorite size.
Once the block is large enough for your desired size, trim off the rough edges.
I don’t get too worried about having the long edges even or even parallel to each other, but you can trim away some of the fraying edges if you need to.
I needed 42 blocks to make a child’s scrappy flannel quilt. In no time, I had a quarter of the blocks done. My goal is to complete the top this week, and I’ll share my progress throughout the week.
Isn’t that an exciting way to kick off the new year? A brand-new sewing machine and a super easy and fast way to use up scraps.
Tomorrow, I have another piecing technique to share with you, and I’ll share more tools and functions on the Husqvarna Viking Opal 670.
Have a great day!
Ciao!
This is part 1 of 5 in this series
Go to part 2: Why are you so afraid of Y-seams in your quilt designs?
3 comments