I’m excited about this week, as we have many techniques to learn using the Husqvarna Viking Opal 670. Yesterday, we saw how easy it is to chain piece when making improv scrap blocks. I hope you dug out some scraps to give those blocks a try, as it’s my go-to pattern when my scrap boxes are exploding.
We’ve seen how easy it is to chain piece on the Opal 670, but what about seams that require anchoring at each end? We’ll use the Fix function today and, in the process, I’ll show you how easy it is to make a block with Y-seams.
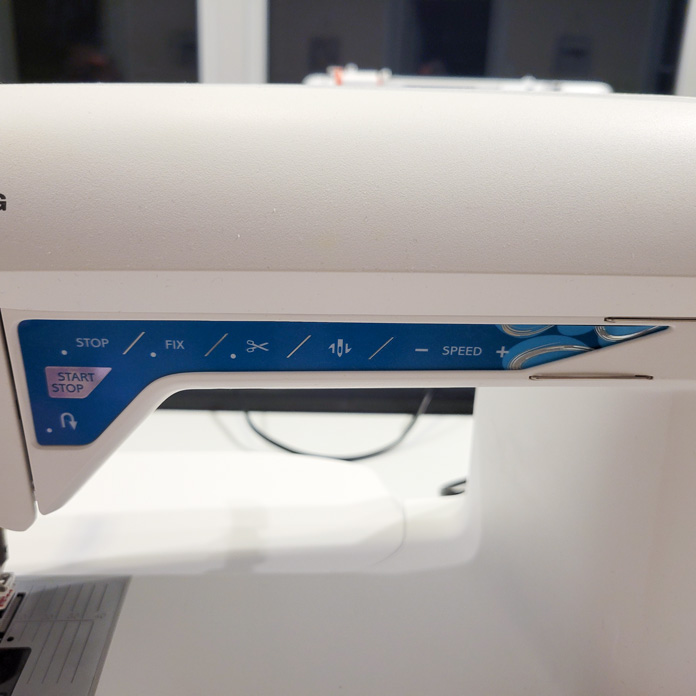
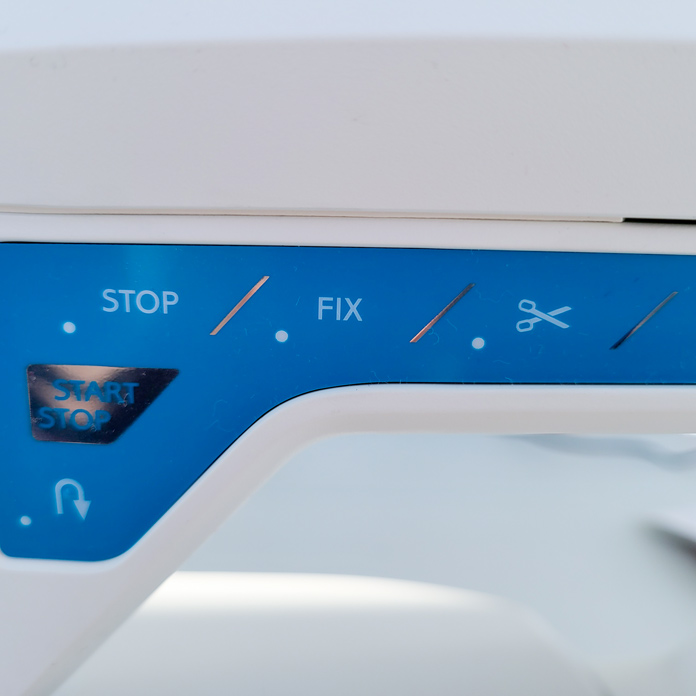
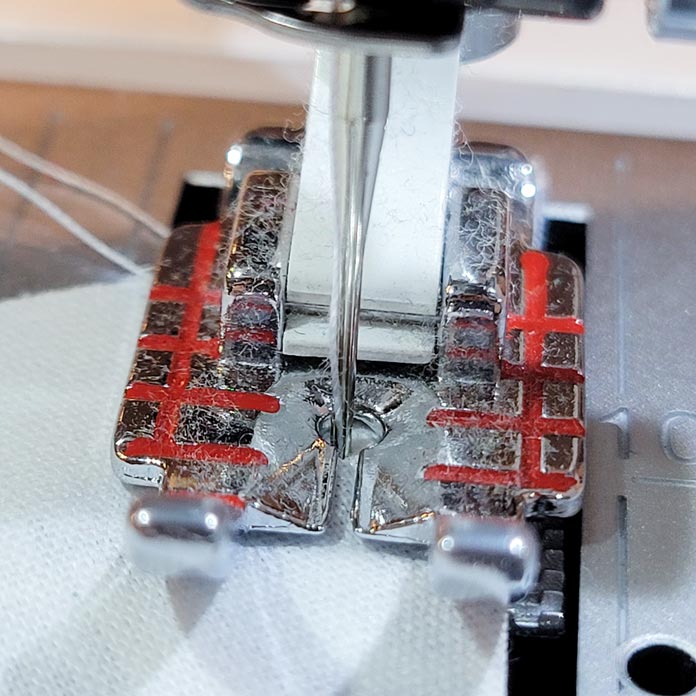
The Fix function, as well as the Scissor function, are located on the function panel on the front of the Opal 670.
When we did the chain piecing, we literally sewed a long chain of pieces without securing the beginnings or the ends of the individual seams. When I use the word securing (sometimes referred to as anchoring) I mean the beginning and the end of each seam is secured so it doesn’t come undone.
It’s important to anchor the ends of any seam. When piecing quilting cotton, I use a stitch length of 2.0, which is a small enough stitch to keep the seam ends from coming apart. While the shorter stitch length helps to secure the ends of the seams, the ends are usually sewn into another seam and the second seam further secures the ends.
I used a slightly longer stitch length (2.5) for the flannel I was working with yesterday, as it’s thicker than quilting cotton. You must use the appropriate stitch length for your project and using the Exclusive Sewing Advisor and choosing the appropriate weight and type of fabric will make that a snap.
If you are into garment sewing, it’s important to anchor the end of the seams, and the most common way is to use the Reverse function which you’ll also find on the function panel.
Today, we’re looking at a Y-seam, using quilting cotton. The issue with the Y-seam is that, while we are using a shorter stitch length, there’s no second seam running over the ends of the stitches to further anchor them in place. In this Tumbling Block quilt block section, there are three seams which meet at the ends (in the center), but they don’t intersect each other. So, it’s very important to secure the ends.
Now we could use the Reverse function, but there’s a better way. The Opal 670 has an amazing feature that makes anchoring these seams a breeze –the Fix function, which is on the function panel. The Scissor (Cut) function, also on the function panel, is a great help with these seams as well.
In case you’re wondering why Y-seams are necessary, it’s because of the nature of the shapes in the block and not being able to sew to the ends of the fabric as we would usually do. This technique helps to reduce the bulk in the block.
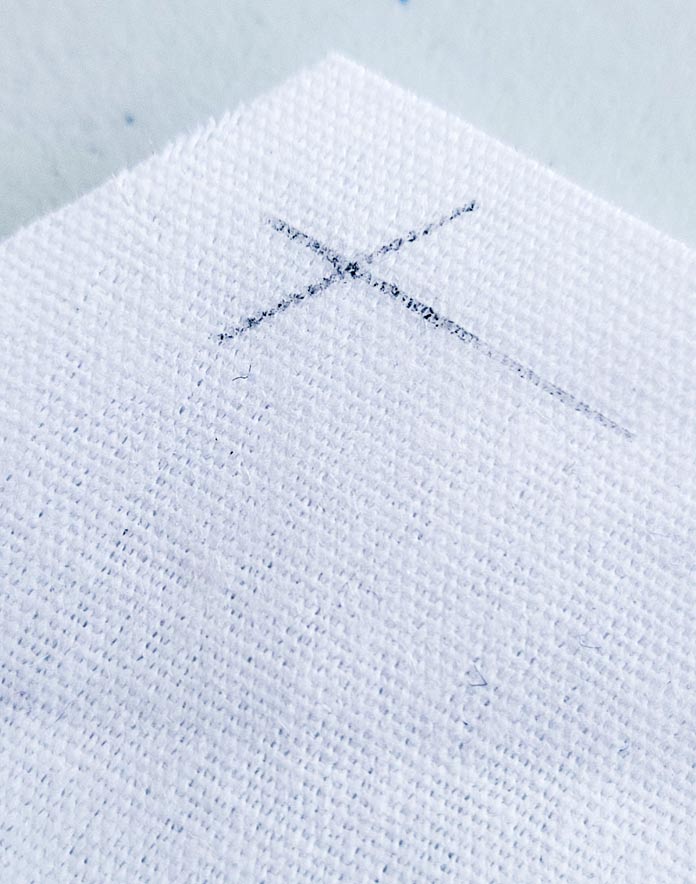
Start by marking the beginnings and ends of all the seams – there are several ways to do this. In this instance, I used a ruler and a very sharp pencil to mark the intersection where the ¼” seam lines will meet. The intersection marks the beginning and the end of two seams. Sewing a Y-seam is not a fast process, like chain piecing, but it allows to make some intricate blocks with weird angles and it’s a great skill to have in your sewing toolbox.
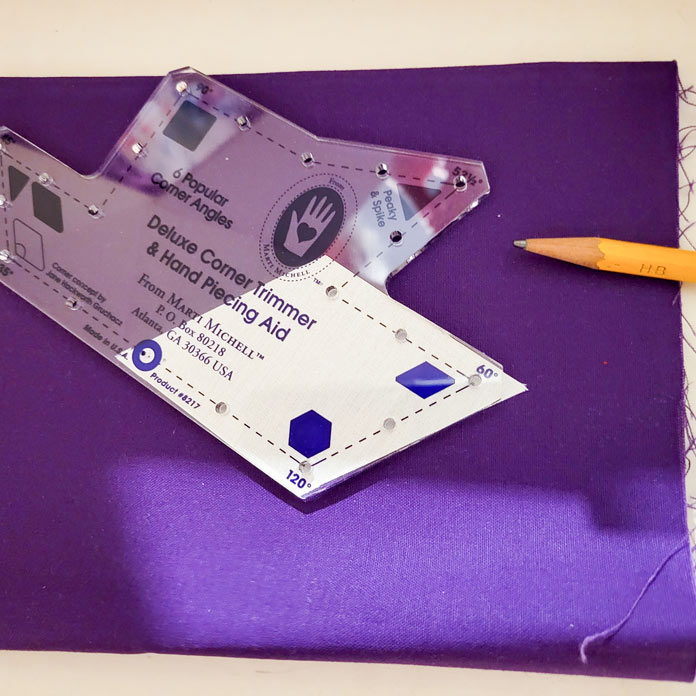
The other way to mark the beginning and end is to use a tool with a variety of angles. There’s a hole in each of the different angles and once you line the appropriate angle with the angle of your pieces, you simply use the sharp pencil to mark the ends of the seams.
It’s not necessary to mark all the beginning and ends, and once you start sewing, you’ll know which ones need to be marked. For instance, if I’ve marked the intersections on this white diamond, I don’t have to mark all the intersections on the piece I’m sewing it to. It’s a bit of a slow process, but super easy to do.
There are many instances where the Y-seam technique comes in handy and so does the Fix function on the sewing machine. Think mitered corners and many other quilts including Double Wedding ring, and Inner City.
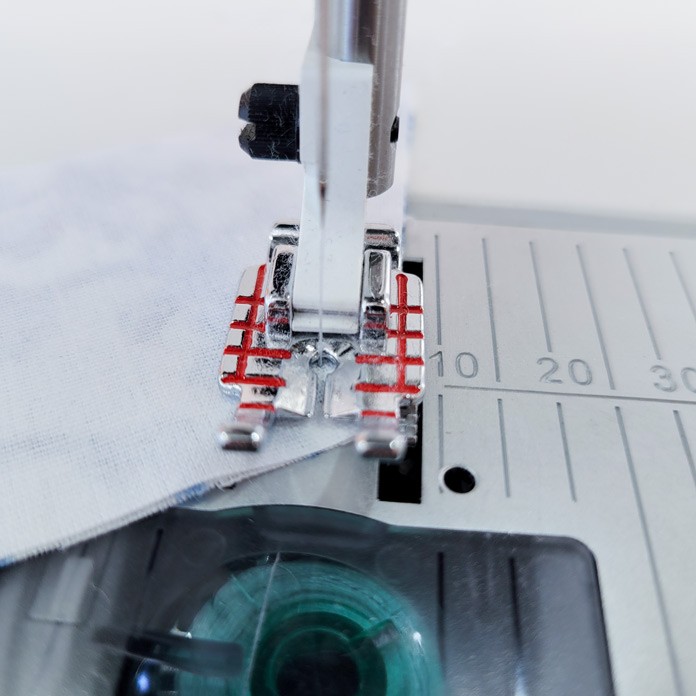
If the Y-seams were on a square or rectangle shape, we could use the lines on the Quilter’s ¼” Piecing Foot, but the angles on the diamond don’t line up, so they need to be marked.
The lines on the Quilter’s ¼” Piecing Foot work for fabric with 90-degree corners, not the 60-degree diamond.
Lay out the diamonds in the correct orientation beside your sewing machine.
Now we get to see the Fix function in action. Place two diamonds together. The beauty of the Y-seam, at least in this instance, is that it doesn’t matter which seam you start with. I usually start by adding the white diamond to the medium color diamond. And as I mentioned earlier, since I have a start and end point marked on the white fabric, I don’t need to mark them on the medium diamond. Learning what ends and starts to mark takes a bit of time to figure out, but once you have that, write it down, so when you’re marking you don’t have to mark all four points on each diamond.
Position the dot under the presser foot. You want to make sure the needle drops right on the dot or intersection. I use the flywheel to drop the needle to get it on the start point of the seam.
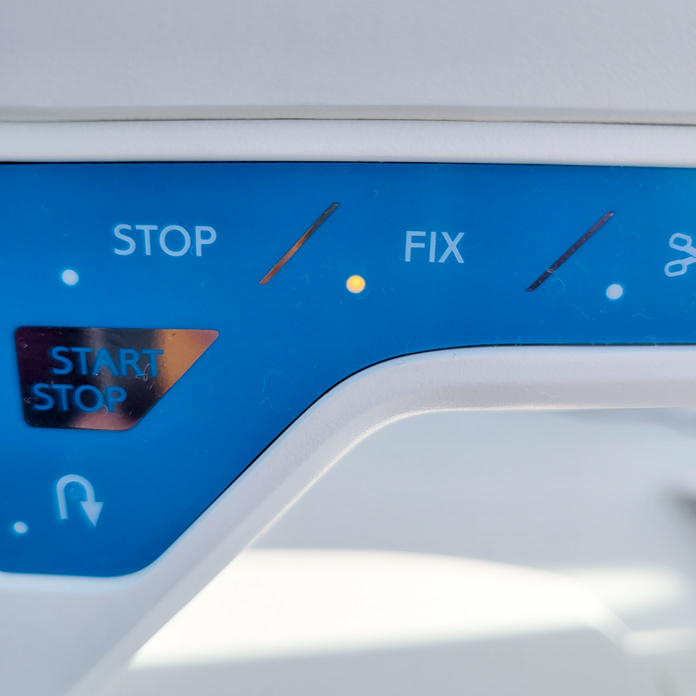
Lower the presser foot and ensure the Fix function is engaged (the light will be on). The Opal 670 will take several stitches in place, thus securing the end of the seam. I like to hold the top and bottom thread when I start, so they don’t go to the bottom and create a thread nest. A good sewing habit for all seams.
Continue sewing until you get to the end dot. Sometimes I need to lift the presser foot slightly to ensure that with my next stitch, the needle will hit the dot. Before proceeding, ensure to engage the Fix function. The machine will advance one more stitch and tie off the end of the seam. Use the Scissor function to cut the thread. Using the Scissor function will reactivate the Fix function, so it’s already activated when you start your next seam. This is the default setting, but you can override the default in the machine settings menu.
During the sewing process, you’ll notice the light on the Fix function is not activated, and as you arrive at the end of the seam you’ll have to touch the function to activate it.
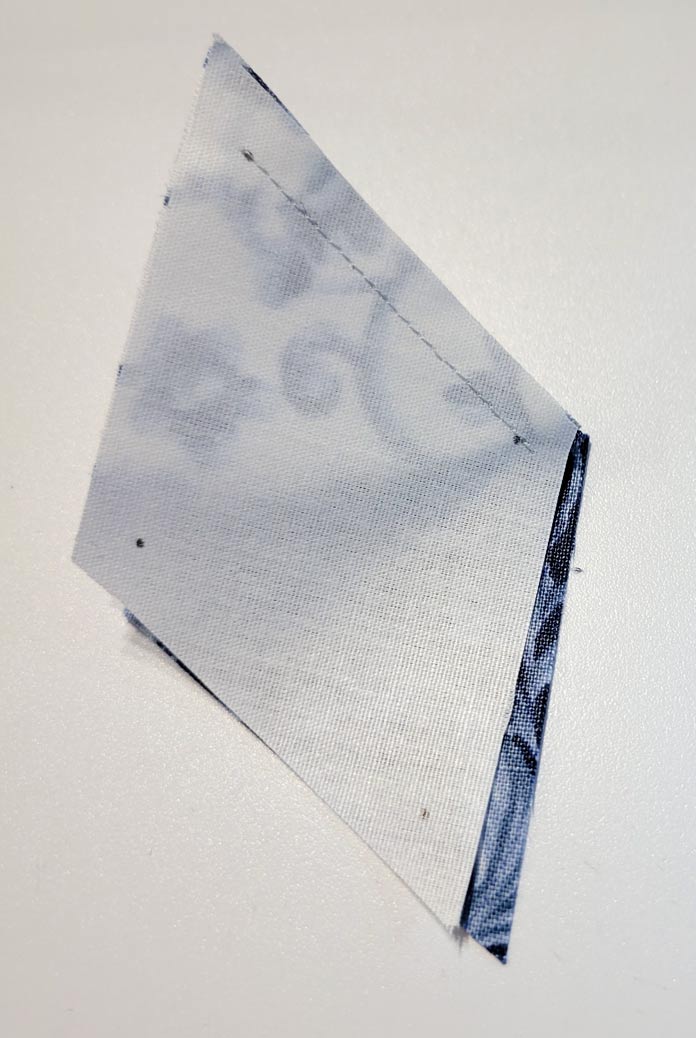
Here’s your finished seam with both ends securely and accurately anchored.
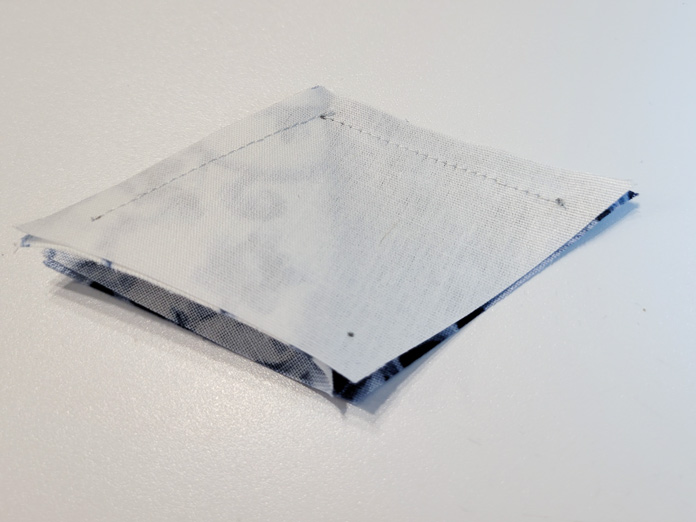
No need to press until all three seams are done.
Now, take the third piece of fabric and line it up with either the white or the medium diamond. Remember, you don’t need to follow the same order in joining these pieces. In this instance, I would join the dark to white and sew on the white which has been marked. I find it way easier to start at the center and sew to the end. The beginning of the seam is marked, and you’ll insert the needle right beside the end of the previous line of stitching.
The seam ends should just touch each other, but not overlap.
Complete the final seam, again starting at the center. It’s a bit tricky when you’re learning, but once you get the hang of it, it’s very easy.
I also ensure to use my Needle Down function, which makes it easier to stay in control of the work. When I start my seam, I manually drop the needle to check the placement and once I’m good, I engage the needle down.
All those functions are so easy to use on the Husqvarna Opal 670. You can sew anything, from simple designs with chain piecing to more complex blocks with Y-seams. There’s nothing you can’t tackle using the Husqvarna Viking Opal 670.
Tomorrow, we’ll have a look at some of the built-in decorative stitches. Be sure to get your Opal 670 out or check with your local dealer to see the machine in person.
Have a good day!!!
Ciao!!!!
This is part 2 of 5 in this series
Go back to part 1: Introducing the (very pretty!) Husqvarna Viking Opal 670
Go to part 3: Quilting is fun with decorative stitches!
3 comments