If you know me at all you know that one of the quilting methods I enjoy the most is applique. In fact it was applique that originally drew me to quilting, appliqued quilts and wall hangings is what hooked me in. All the more reasons to love my PFAFF Creative Sensation Pro which goes above and beyond my expectations with applique. Not only does it have a multitude of stitches I could use to stitch around the edge of my applique but it has built-in applique! You read that right, built in as in pre-loaded into the machine for you to use whenever you want and if that’s not enough, you can edit, change the size and shape. It makes me giddy just to think about it. Let me share what’s to love about the built-in applique on the Creative Sensation Pro.
The pre-existing appliques are not just about shapes, but fonts too and the possibilities are endless. I use these when I’m looking for a quick and effective way to make a wall hanging, or embellish a quilted bag, making the most of the applique fonts for bunting, and in a non-quilting way, it’s a quick way to “patch” those torn pants the kids come home with.
Let me show you how easy it is. Turn on the PFAFF Creative Sensation Pro embroidery machine and set it at embroidery edit mode.
Since a picture is worth a thousand words, let’s follow along the pictures below:
When you’re happy with the shape, size and type of stitch press the little check mark in the top right hand corner. That’s pretty much it, you’re ready to machine embroider that applique piece onto your block.
Let me explain further:
- Hoop some stabilizer and the base fabric and thread the machine.
- Press start.
- The machine will do an outline stitch of the applique shape–this is shows where to place the applique fabric. The machine will stand by until the applique fabric is placed over the outline.
TIP I like to cut my fabric a bit larger than the applique shape making it easier to trim later.
Once the applique fabric is placed:
- Press start again
- The machine will do two lines of stitching to firmly hold the applique fabric in place and then stop again.
- Remove the hoop or leave it on the machine to trim around the applique shape. I like to use my Inspira Applique Scissors for this part
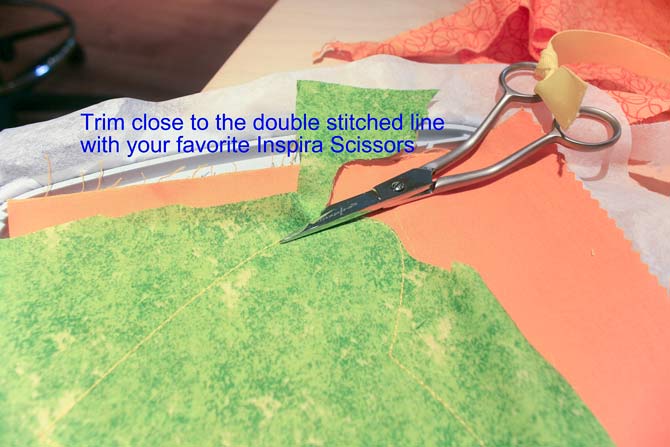
When done trimming all the way around the shape, reinsert the hoop and press start.
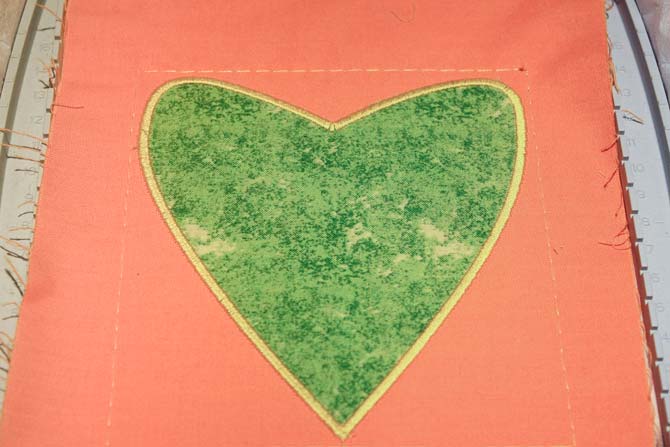
And done! Well almost anyway, you have to wait for it to finish the edge stitching, I went for the traditional satin stitch for this project but I also like the look of candlewicking, or a blanket stitch or…well there are just so many to choose from.
What’s to love about the built-in applique on the Creative Sensation Pro? It’s no wonder I love this sewing and embroidery machine for applique. It’s user friendly, built-in, meaning it’s at my finger tips any time of the day or night I want to make another block for my applique quilt, in my opinion and with my love of applique this is great reason enough to own this machine.
1 comment